Updates from 06/01/2023
The content has been revised due to WafCharm update.
Updates from 03/23/2023
Due to the Credential Store feature release, the procedure has been updated.
*This entry was originally written in Japanese in the past.
Table of Contents
- 1. Steps to start using WafCharm
- 2. Preparation
- 3. Sign up for an account
- 4. Subscribe to a plan
- 5. Add Web ACL and Web Site configurations
- 6. Start using WafCharm
1. Steps to start using WafCharm
In this post, we will introduce the procedure to sign up on WafCharm.
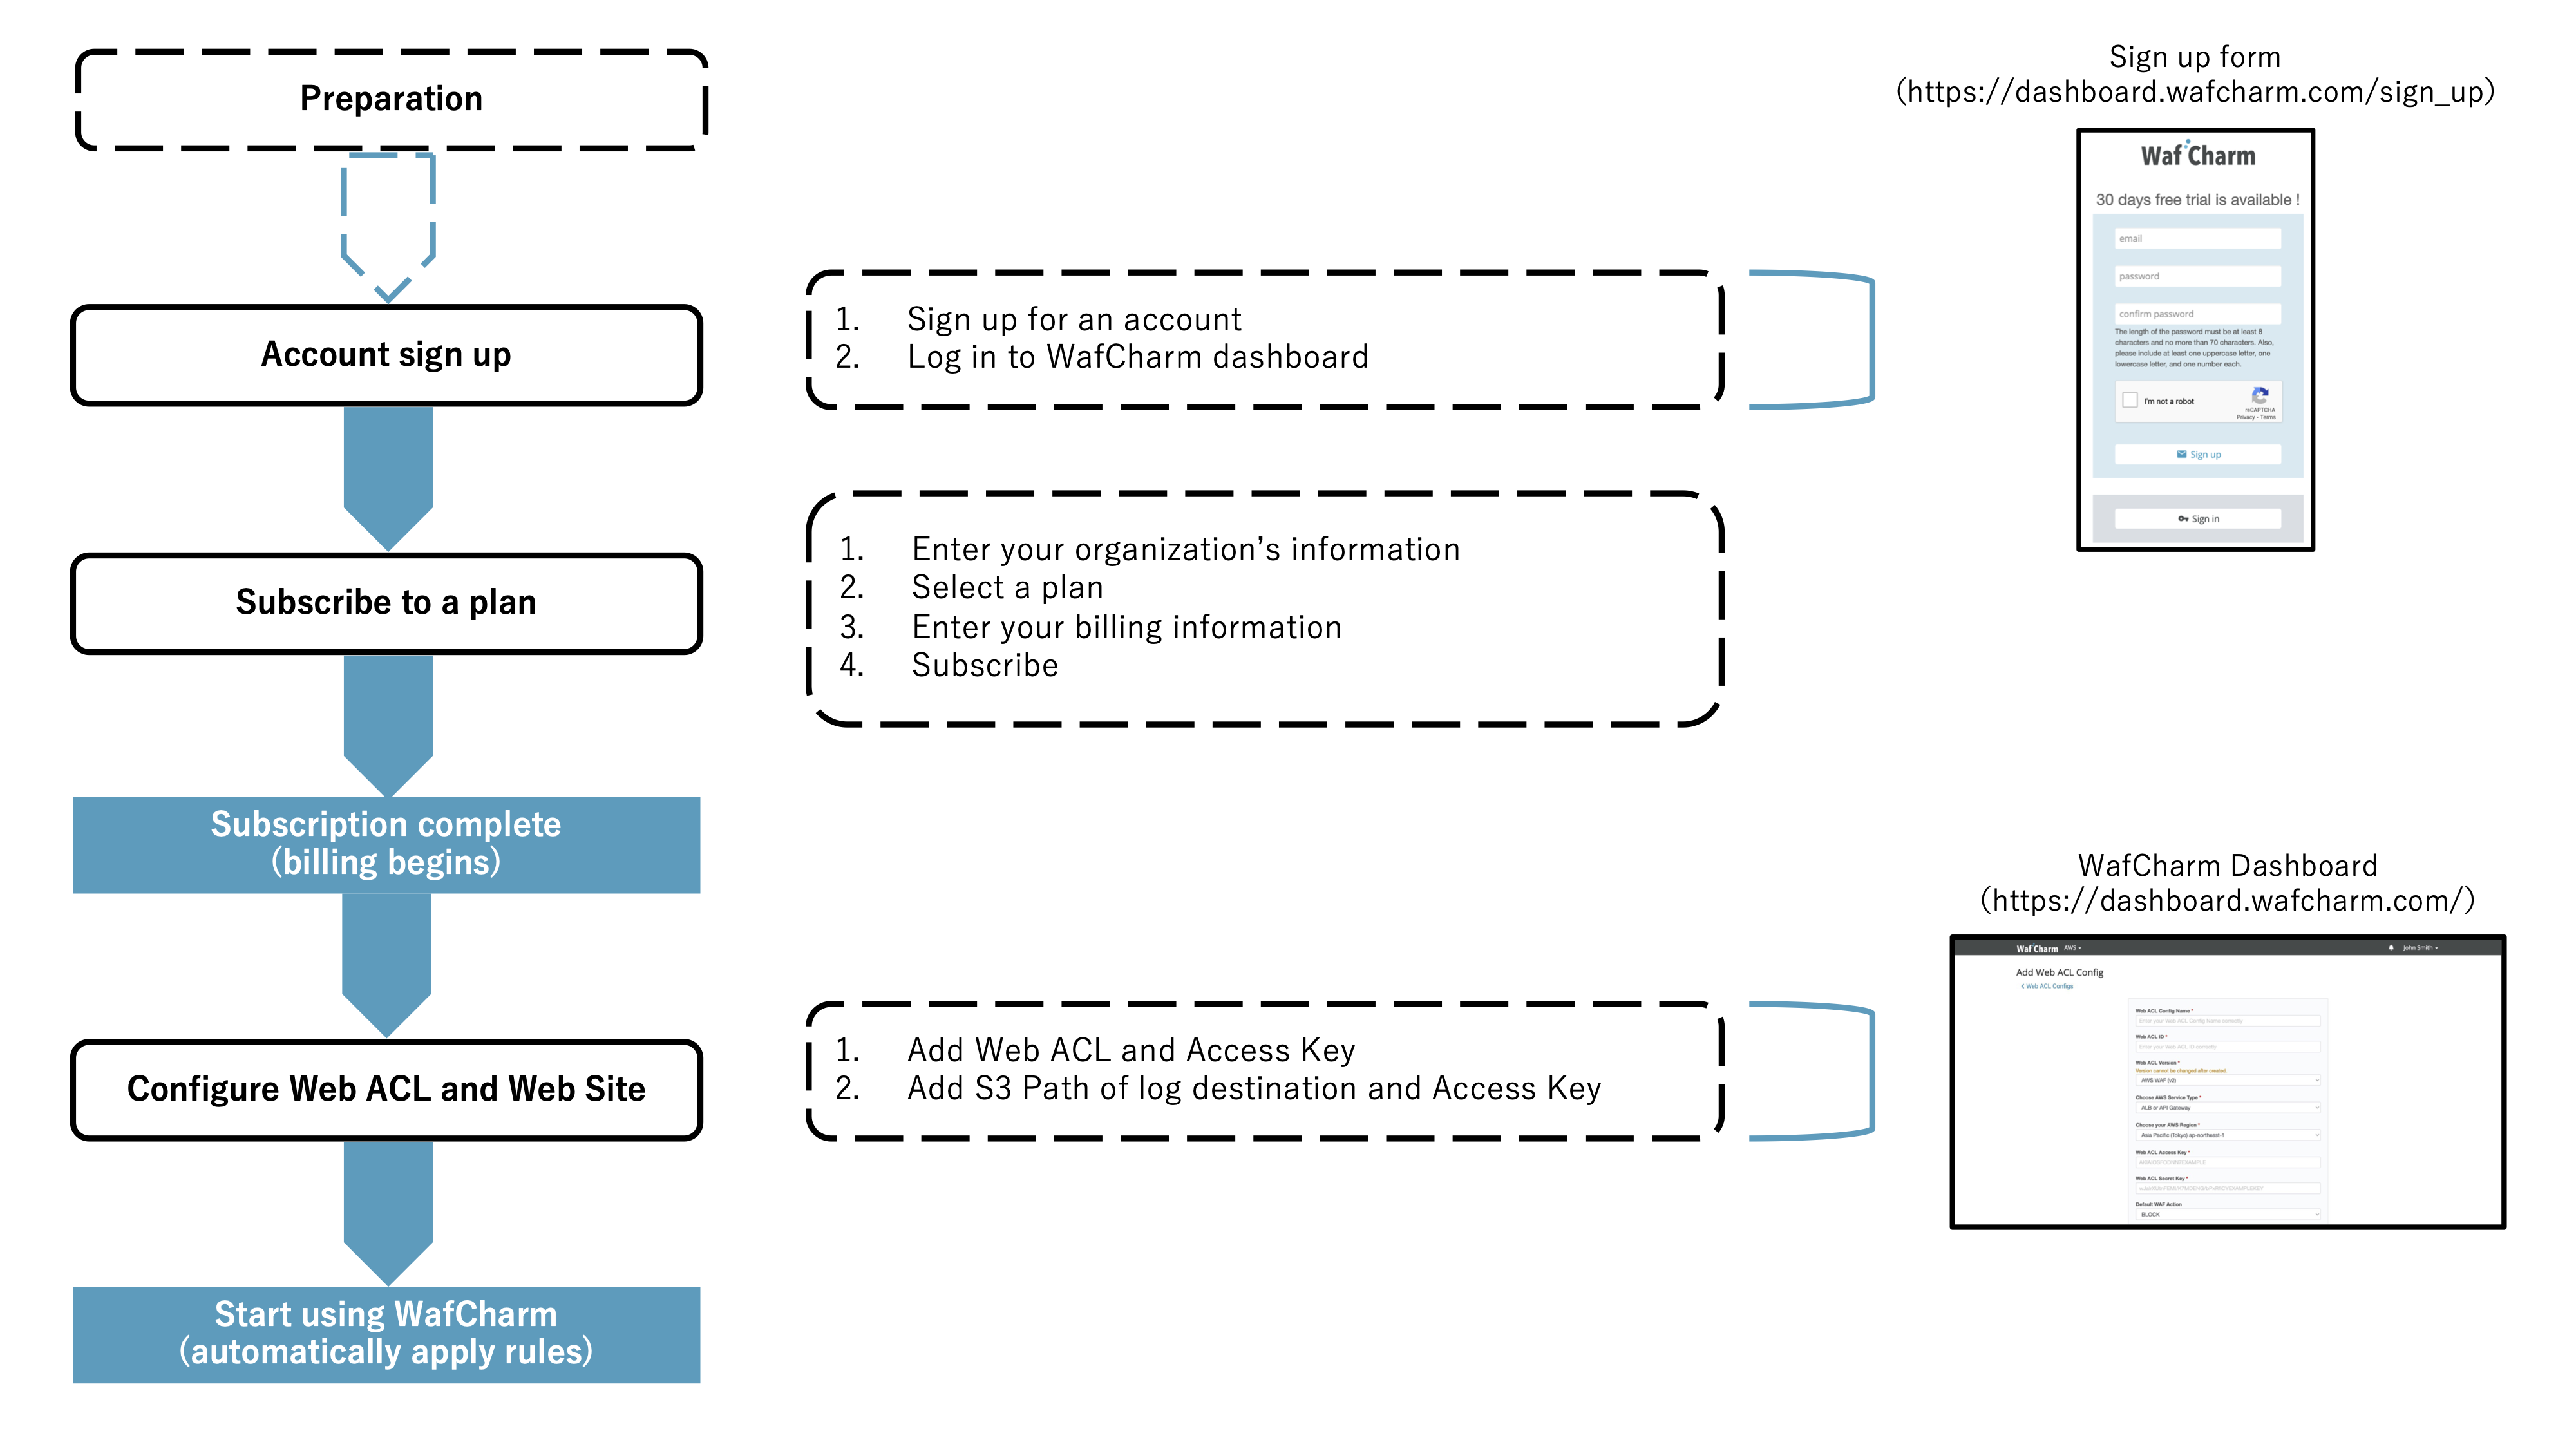
*If you are signing up through one of our partners, you will go through a different process. Please contact your partner for support.
2. Preparation
To smoothly sign up for WafCharm, we recommend that you prepare information from your AWS environment before you start step 5. Add Web ACL and Web Site configurations.
There are four main items you need to prepare.
- Web ACL (Web ACL ID)
- Full access permission for AWS WAF (AssumeRole or Access Key/Secret Key)
- Destination of access logs (S3 Path)
- Read permission for your S3 (Assume Role or Access Key/Secret Key)
- Read permission for your CloudWatch(AssumeRole or Access Key/Secret Key)
*Access key/Secret key method is not recommended.
For more information, please refer to the blog post below.
WafCharm Initial Setting Manual
3. Sign up for an account
3.1 Access the sign up form (https://dashboard.wafcharm.com/sign_up) and enter your email address and password to sign up.
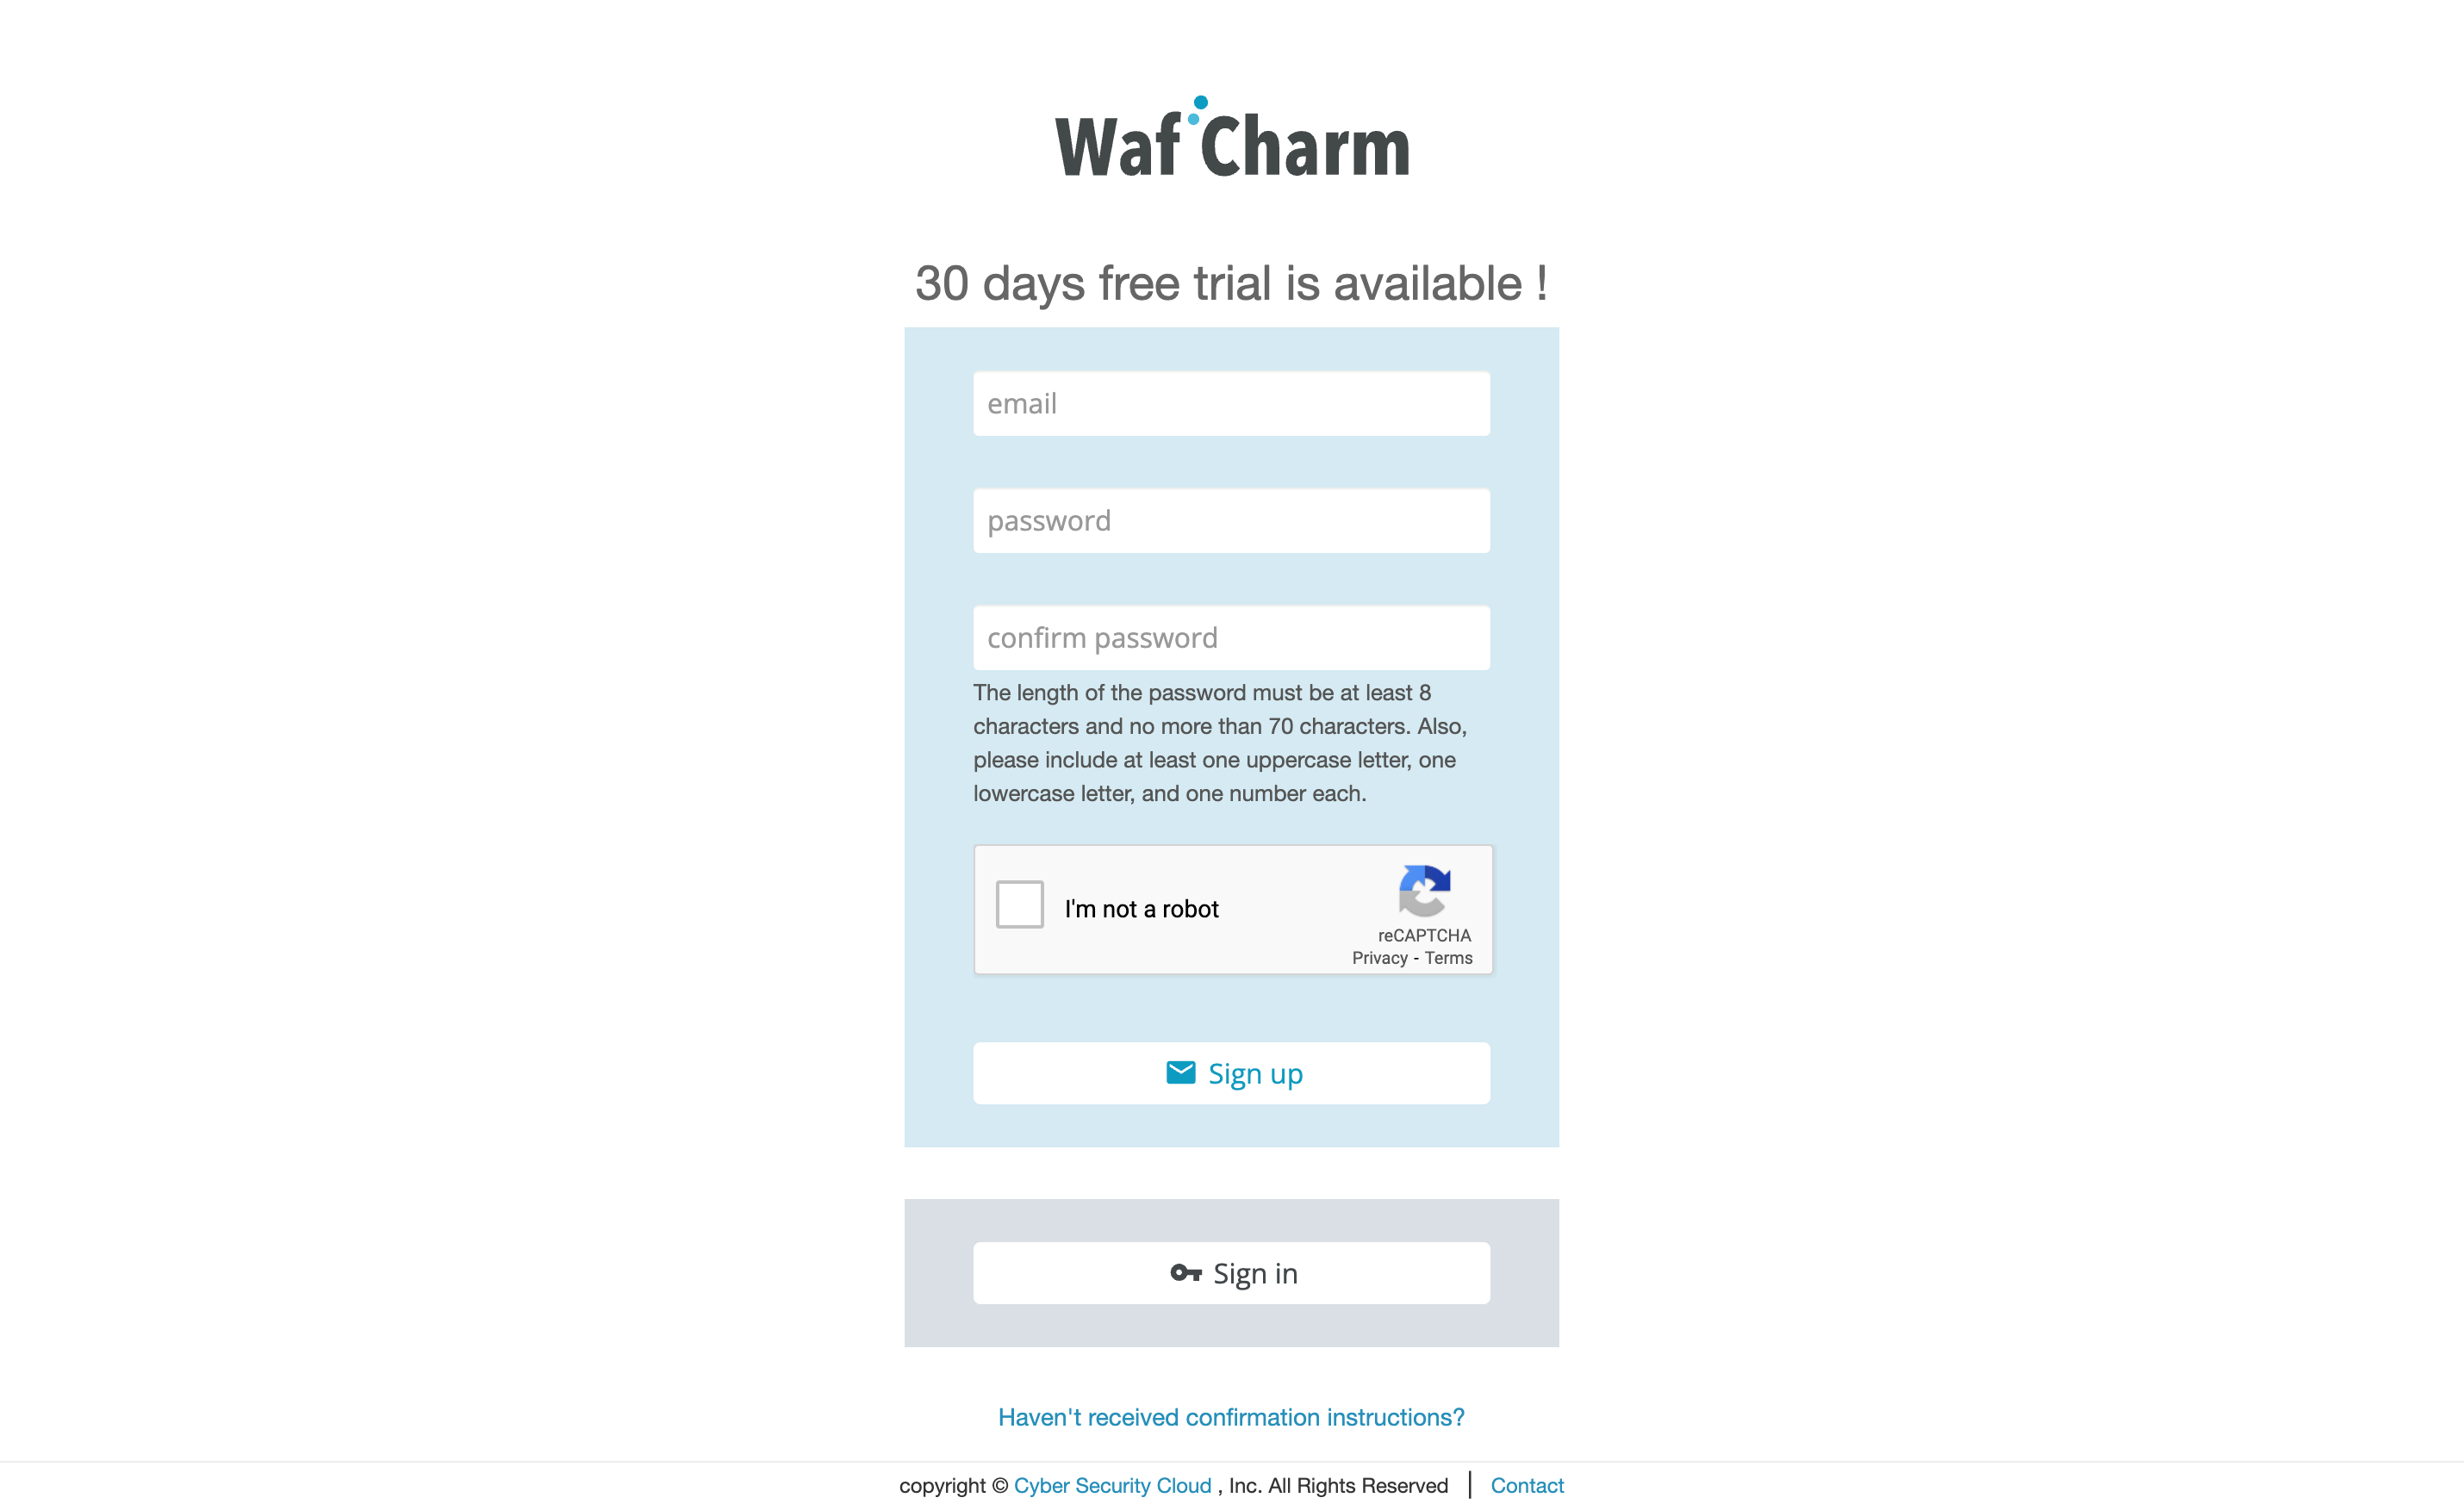
3.2 When you click on the “Sign up” button, you will receive a confirmation email from noreply@wafcharm.com to the email address you’ve entered. Click the “Confirm my account” link in the email.

3.3 Sign up is complete.
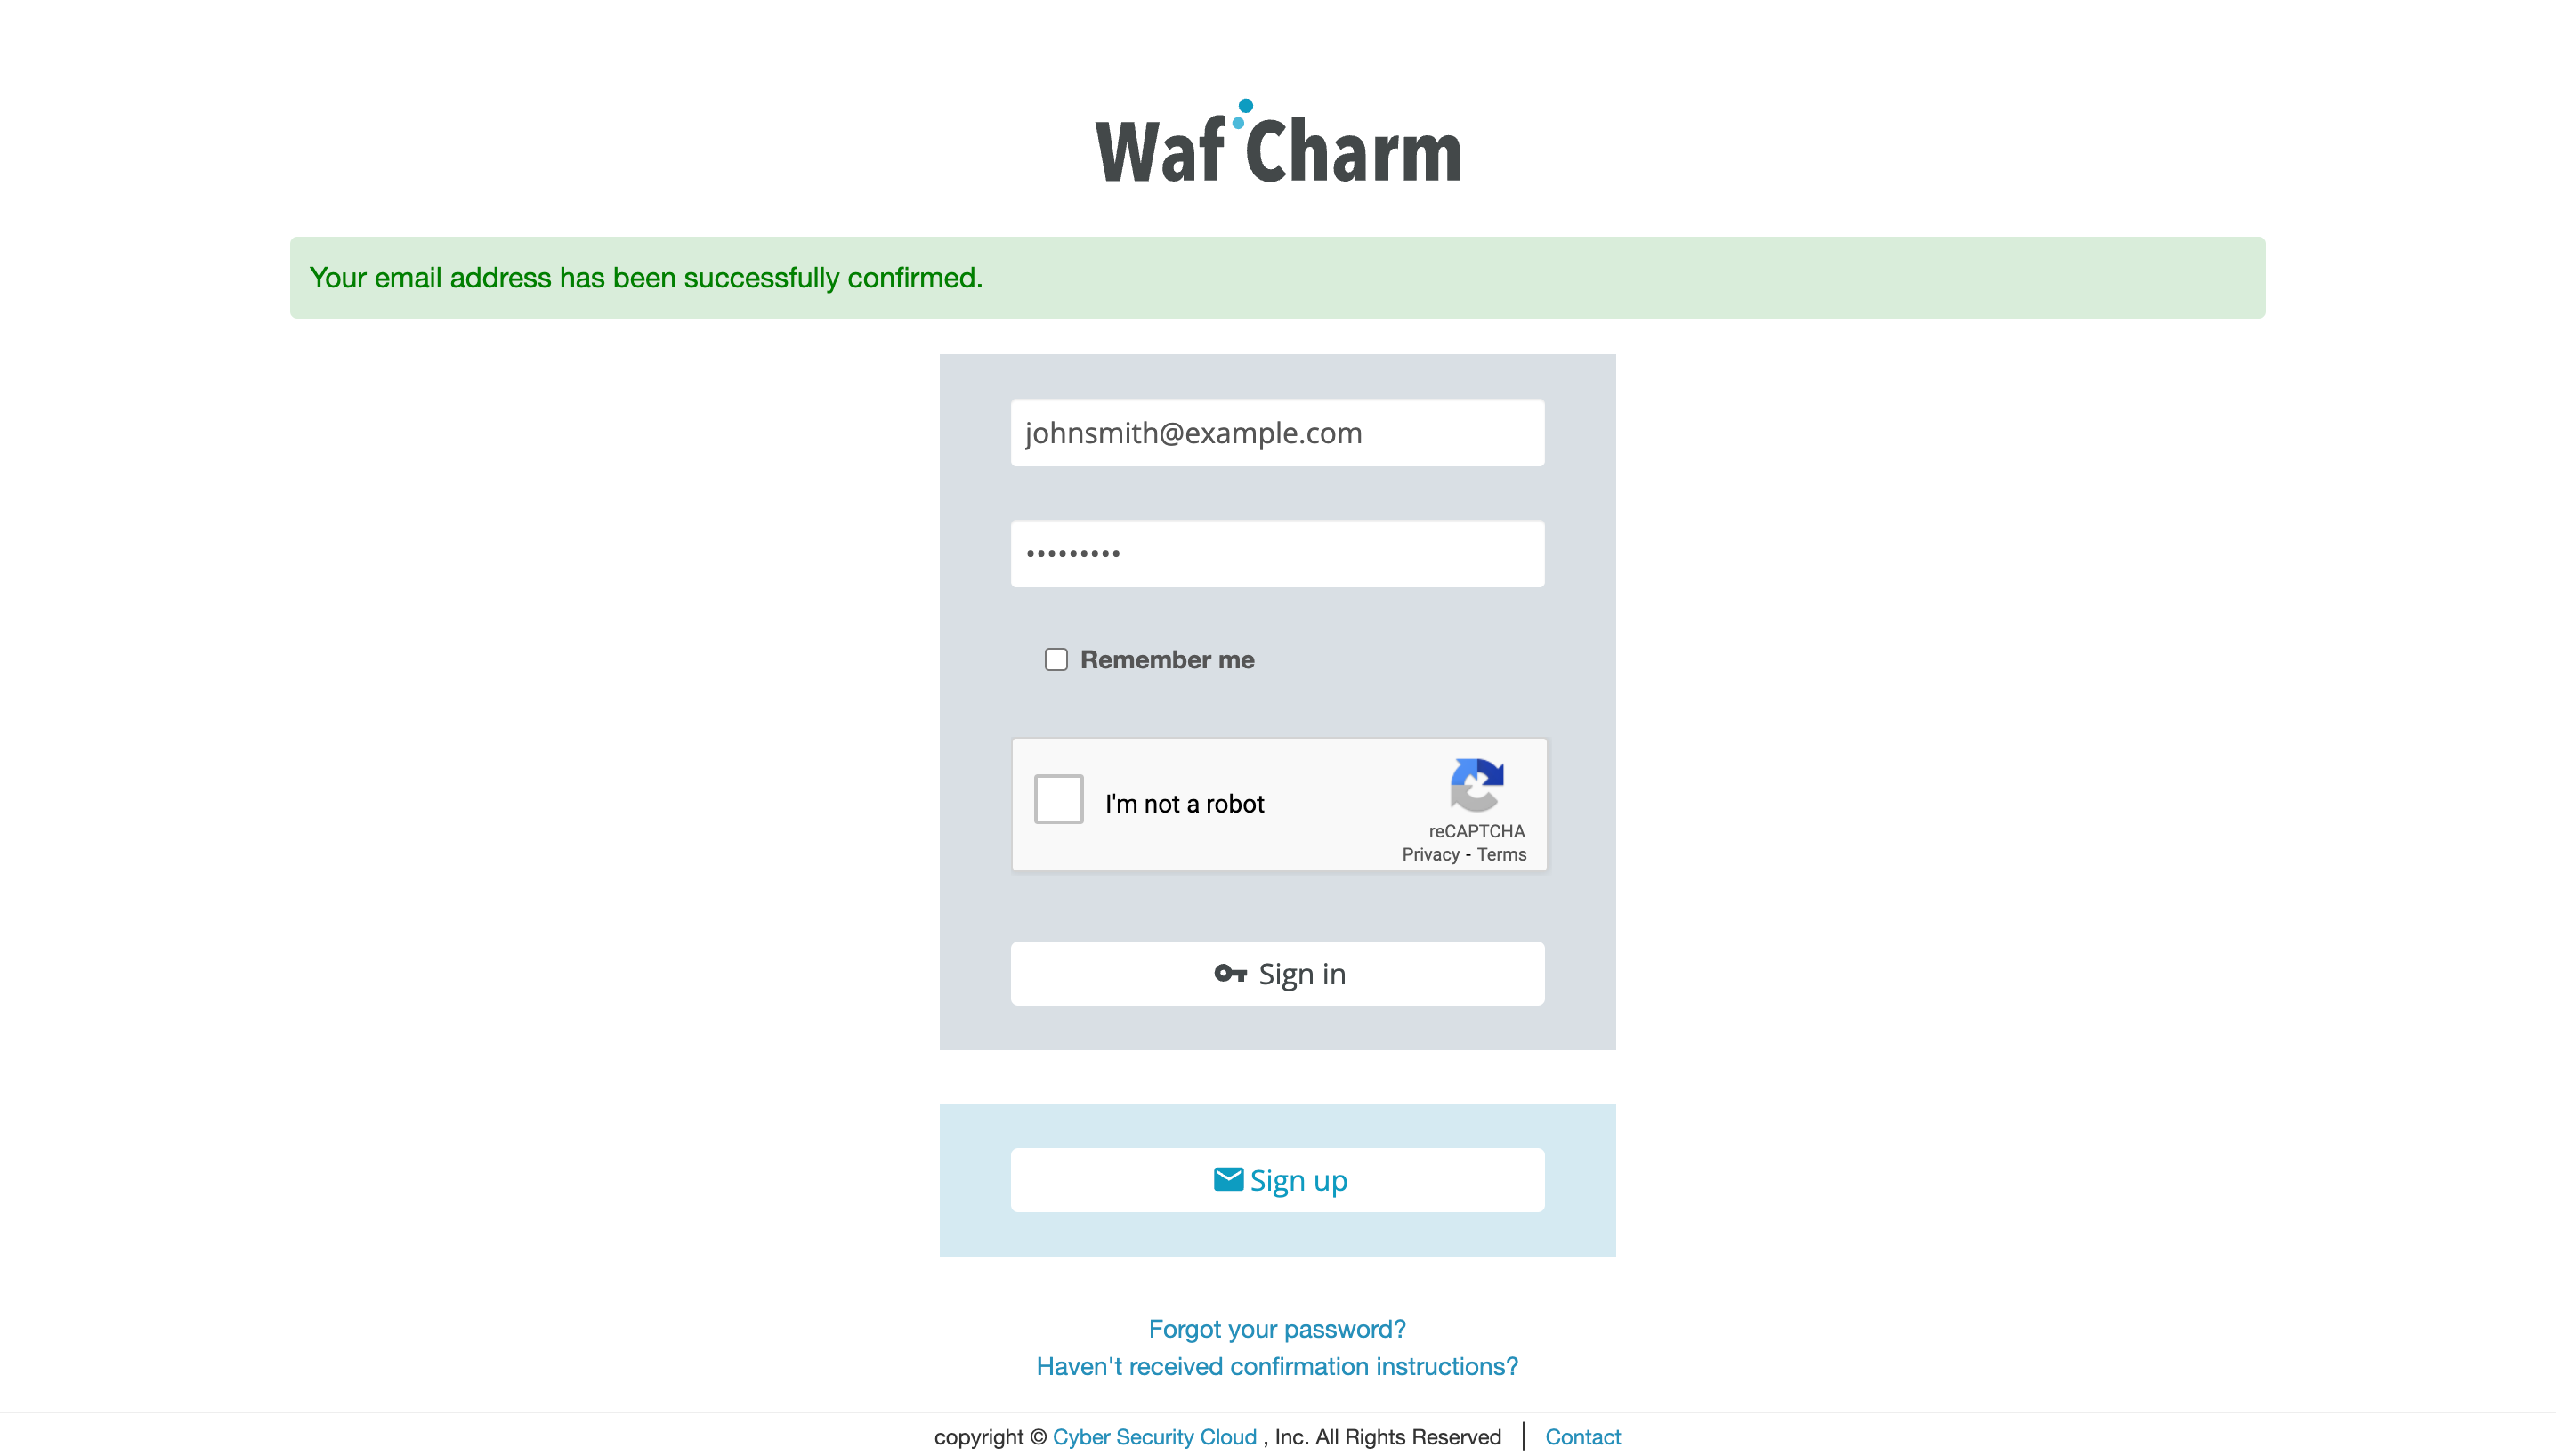
4. Subscribe to a plan
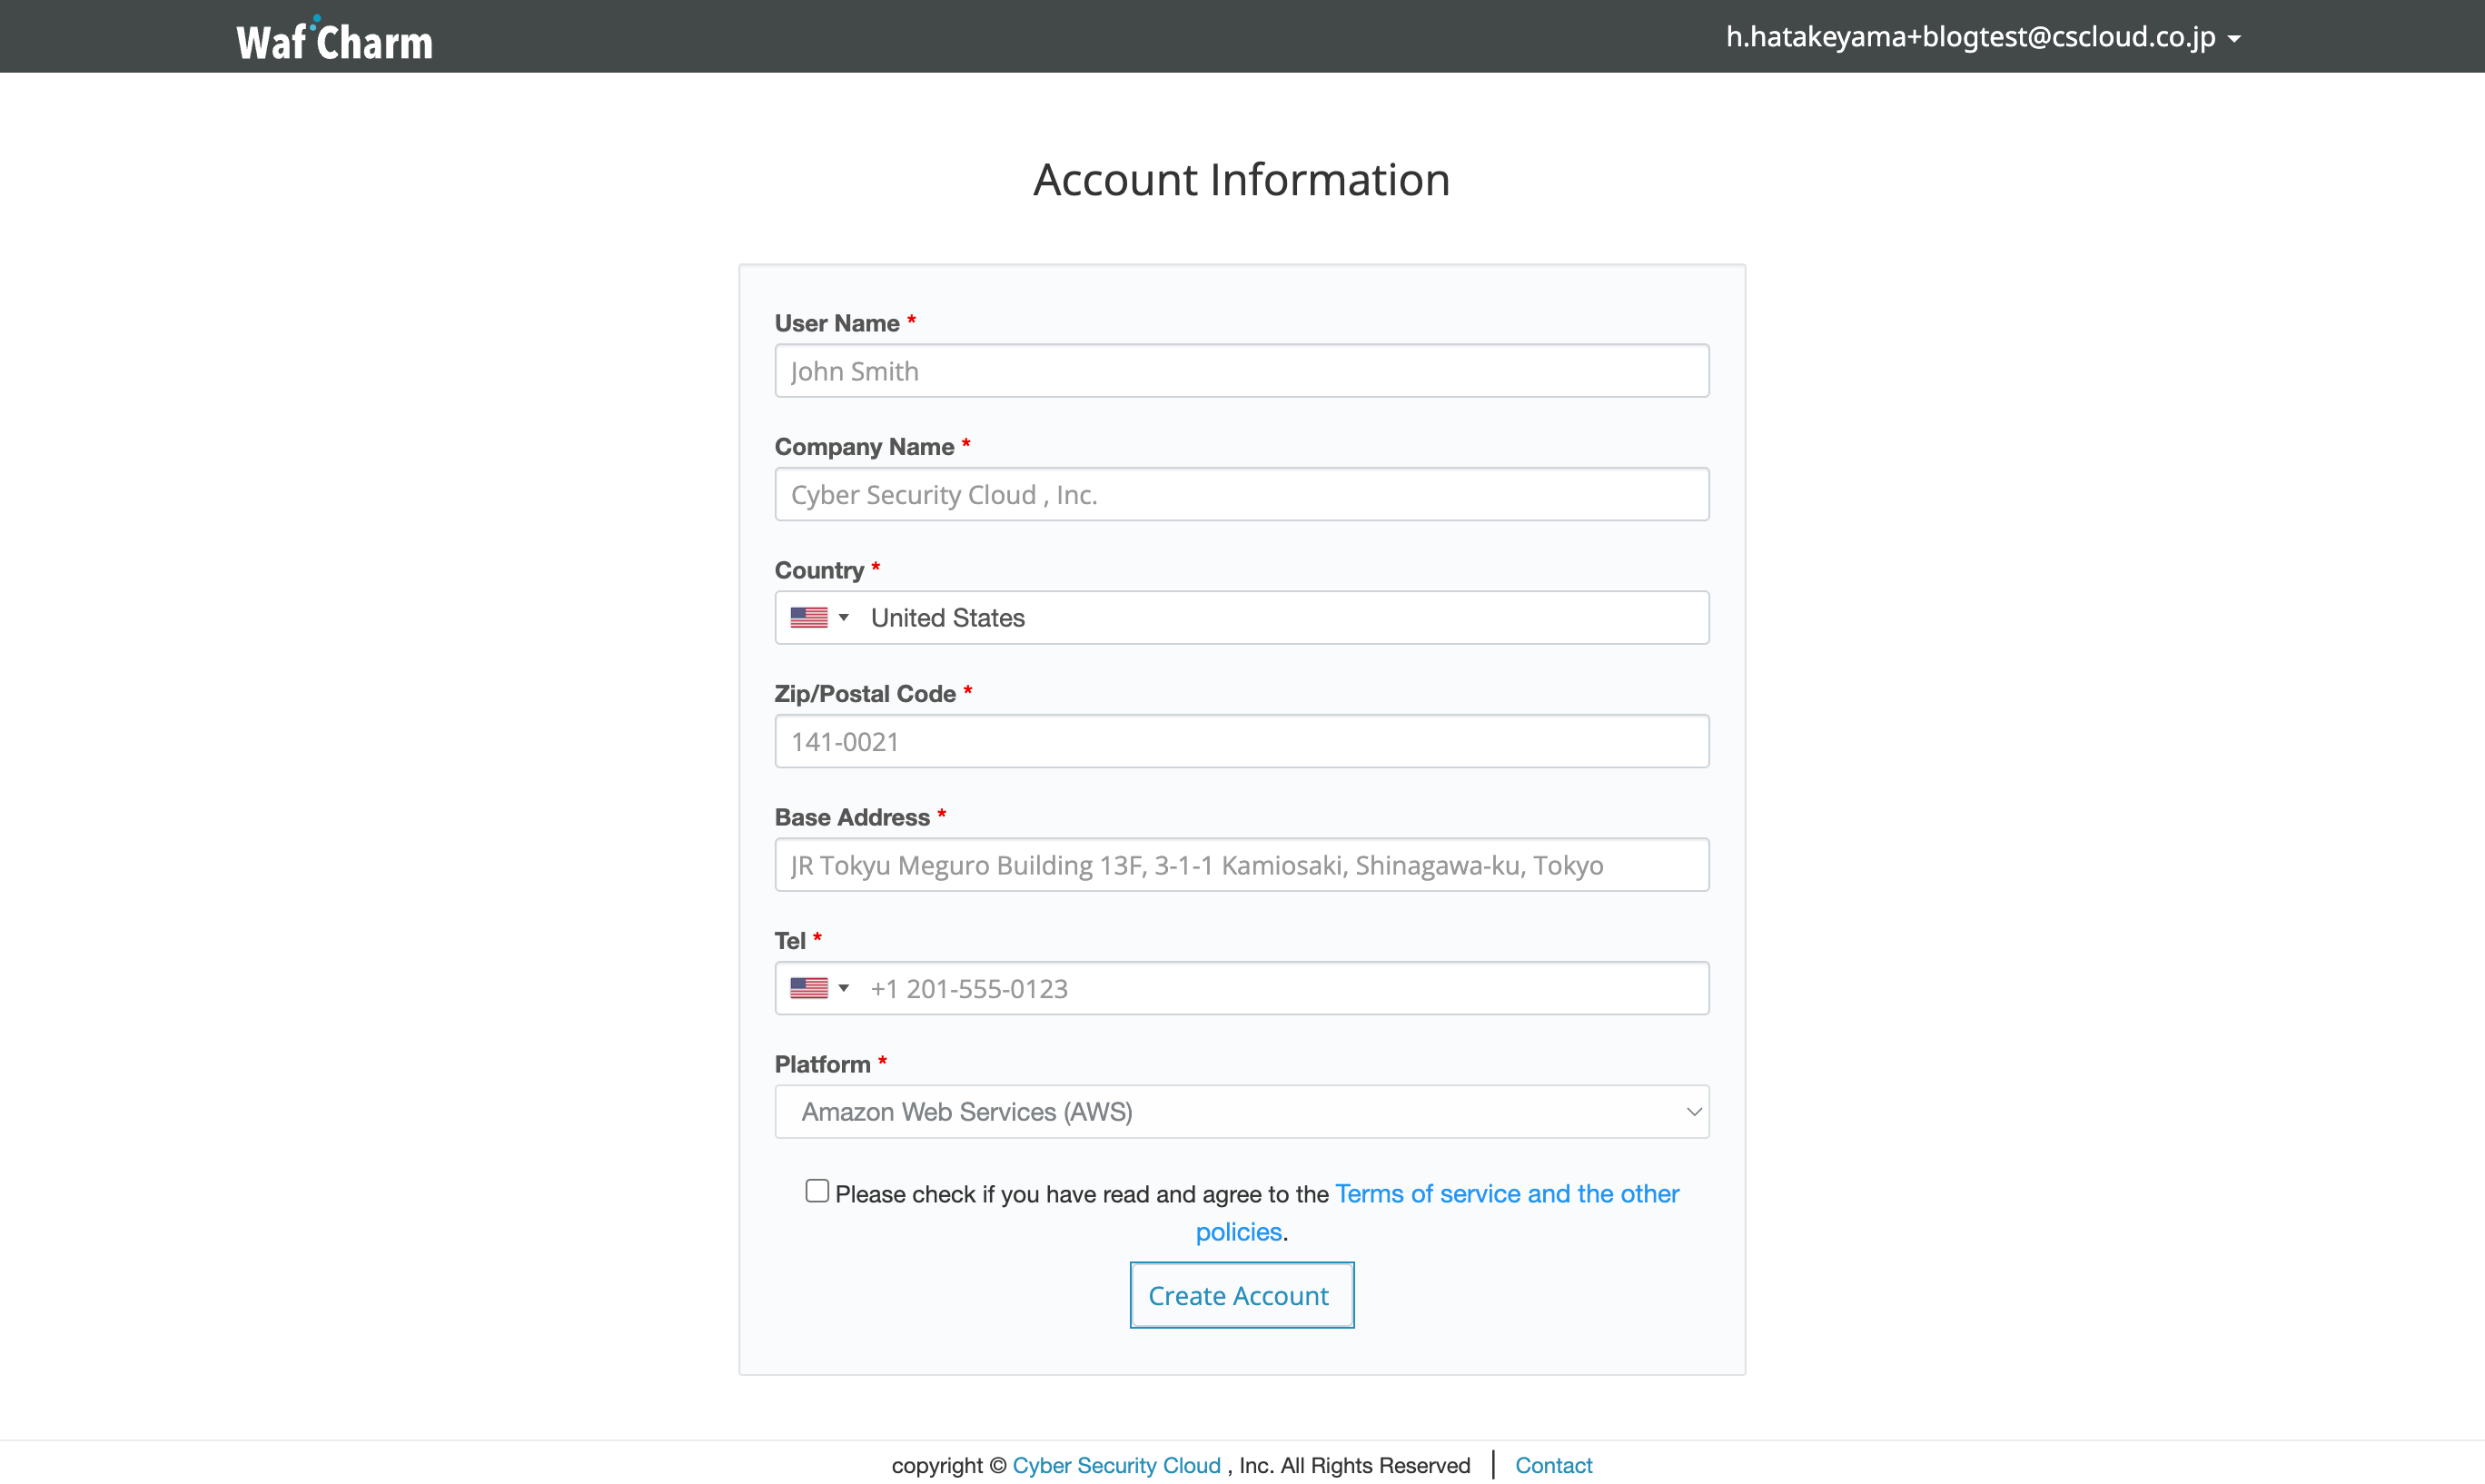
4.1 Enter your name, company name, country, zip/postal code, address, and telephone number. Once you’ve read the terms of service and the other policies (ex. descriptions on provided plans), check to agree and click the “Create Account” button to proceed.
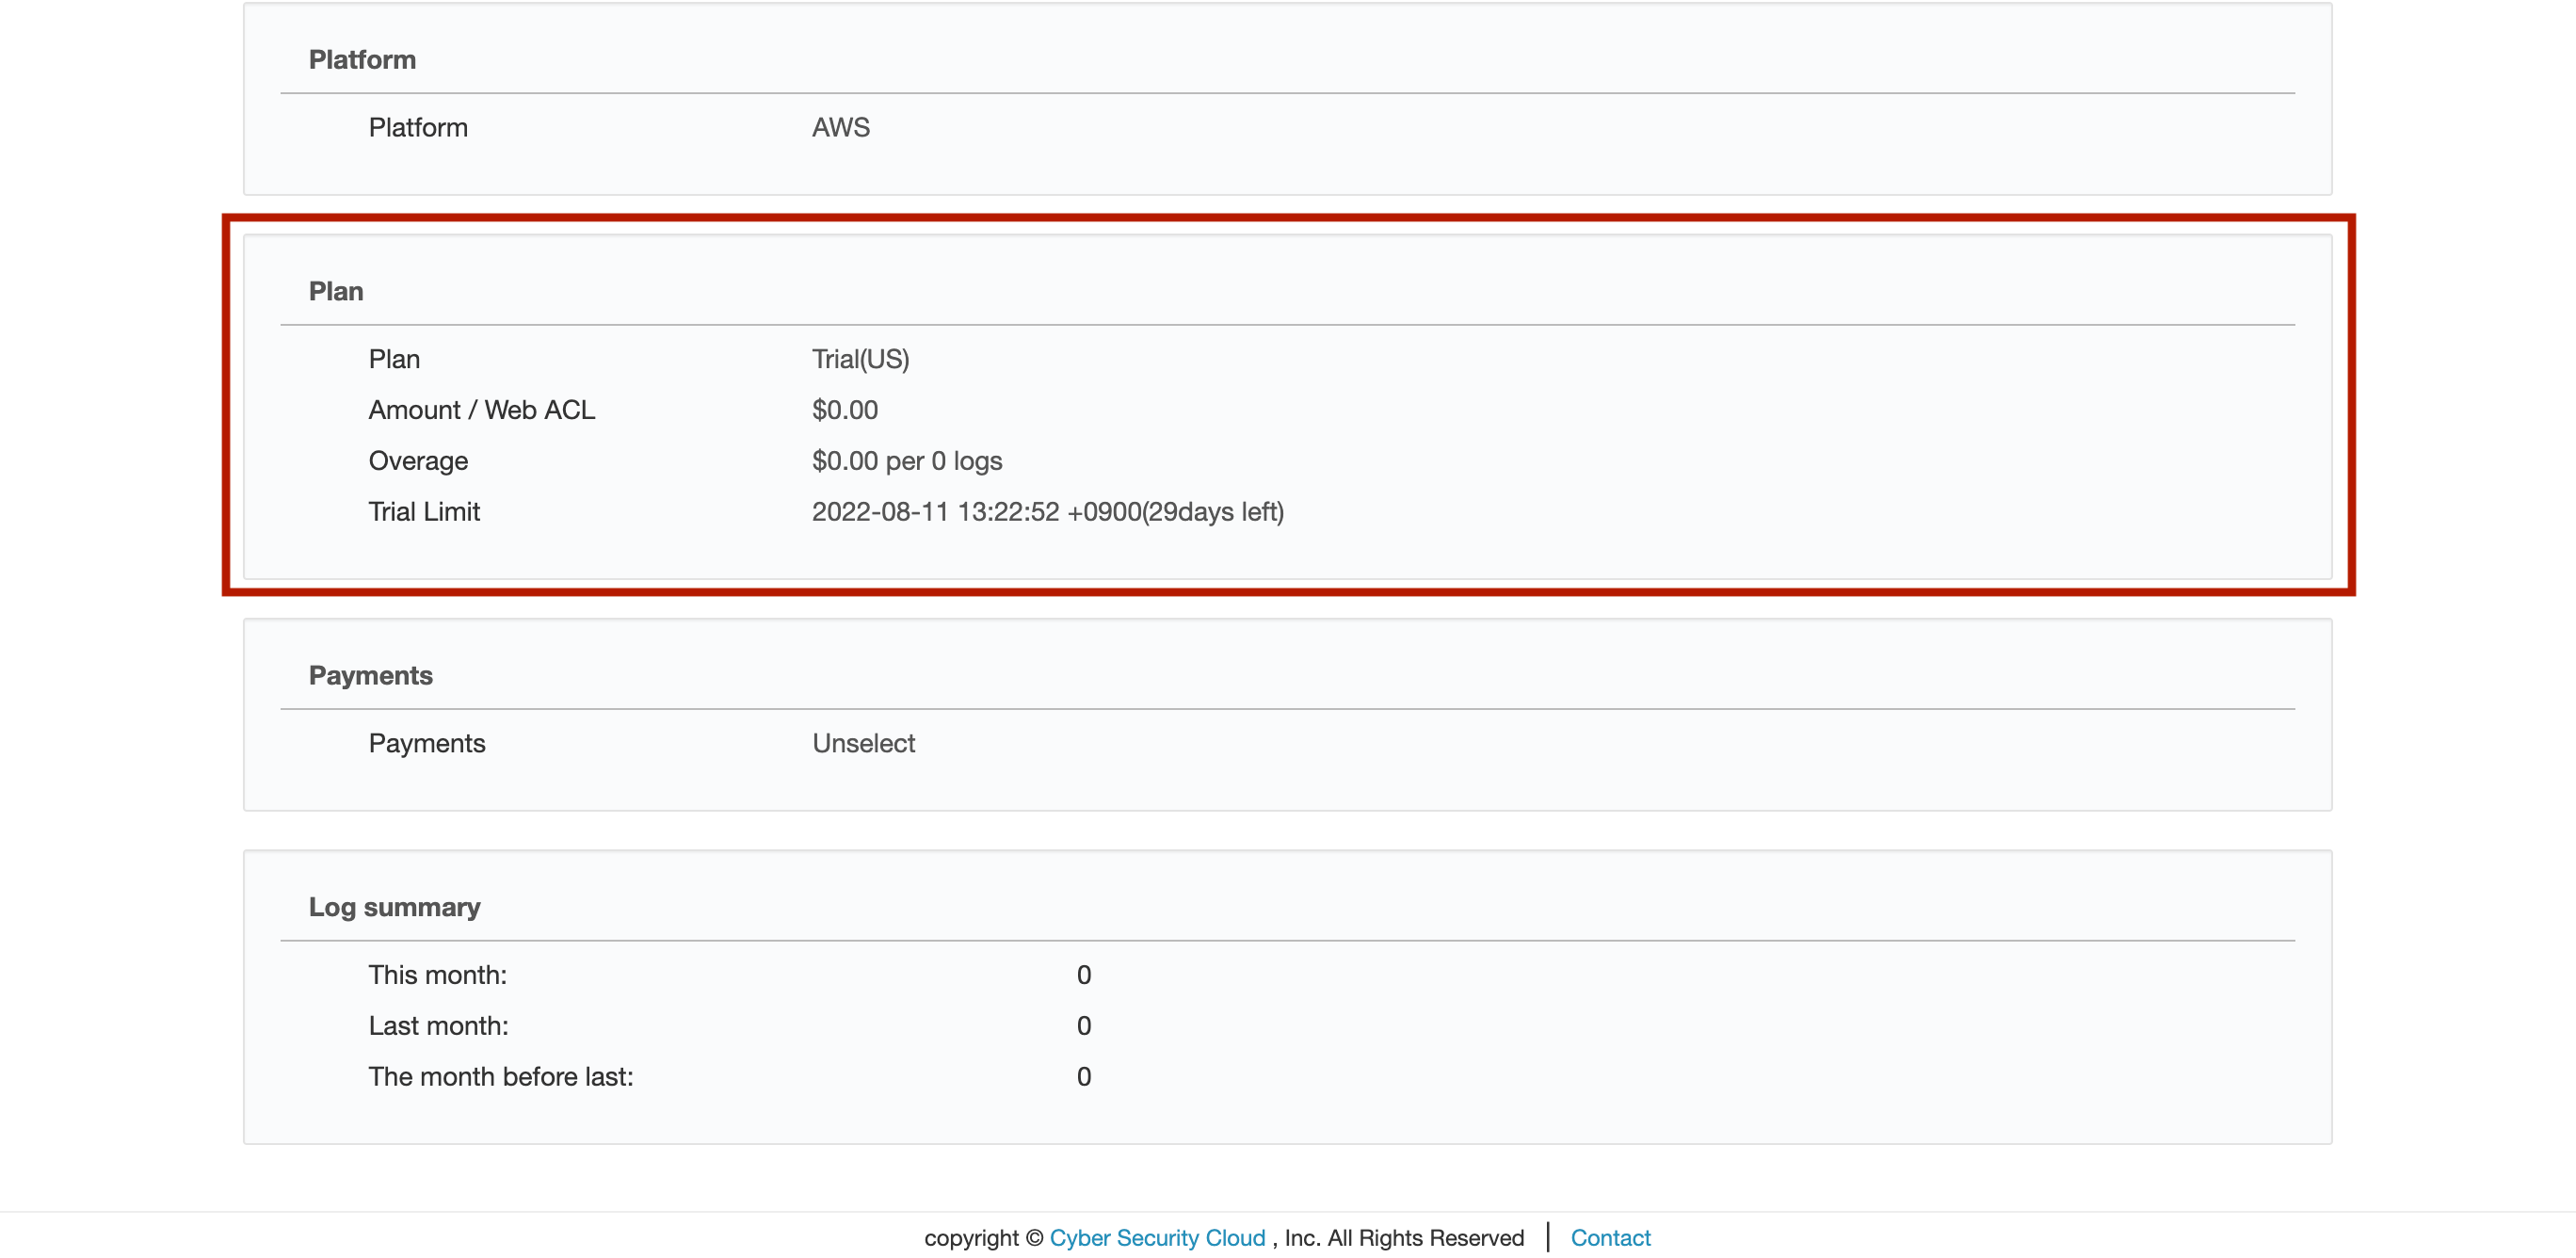
4.2 You can see your current plan (Trial) and how many days you have left of the trial by going to the Plan section on the Account page.

4.3 You can upgrade your plan by clicking on the “Upgrade Plan” link on the Account page.
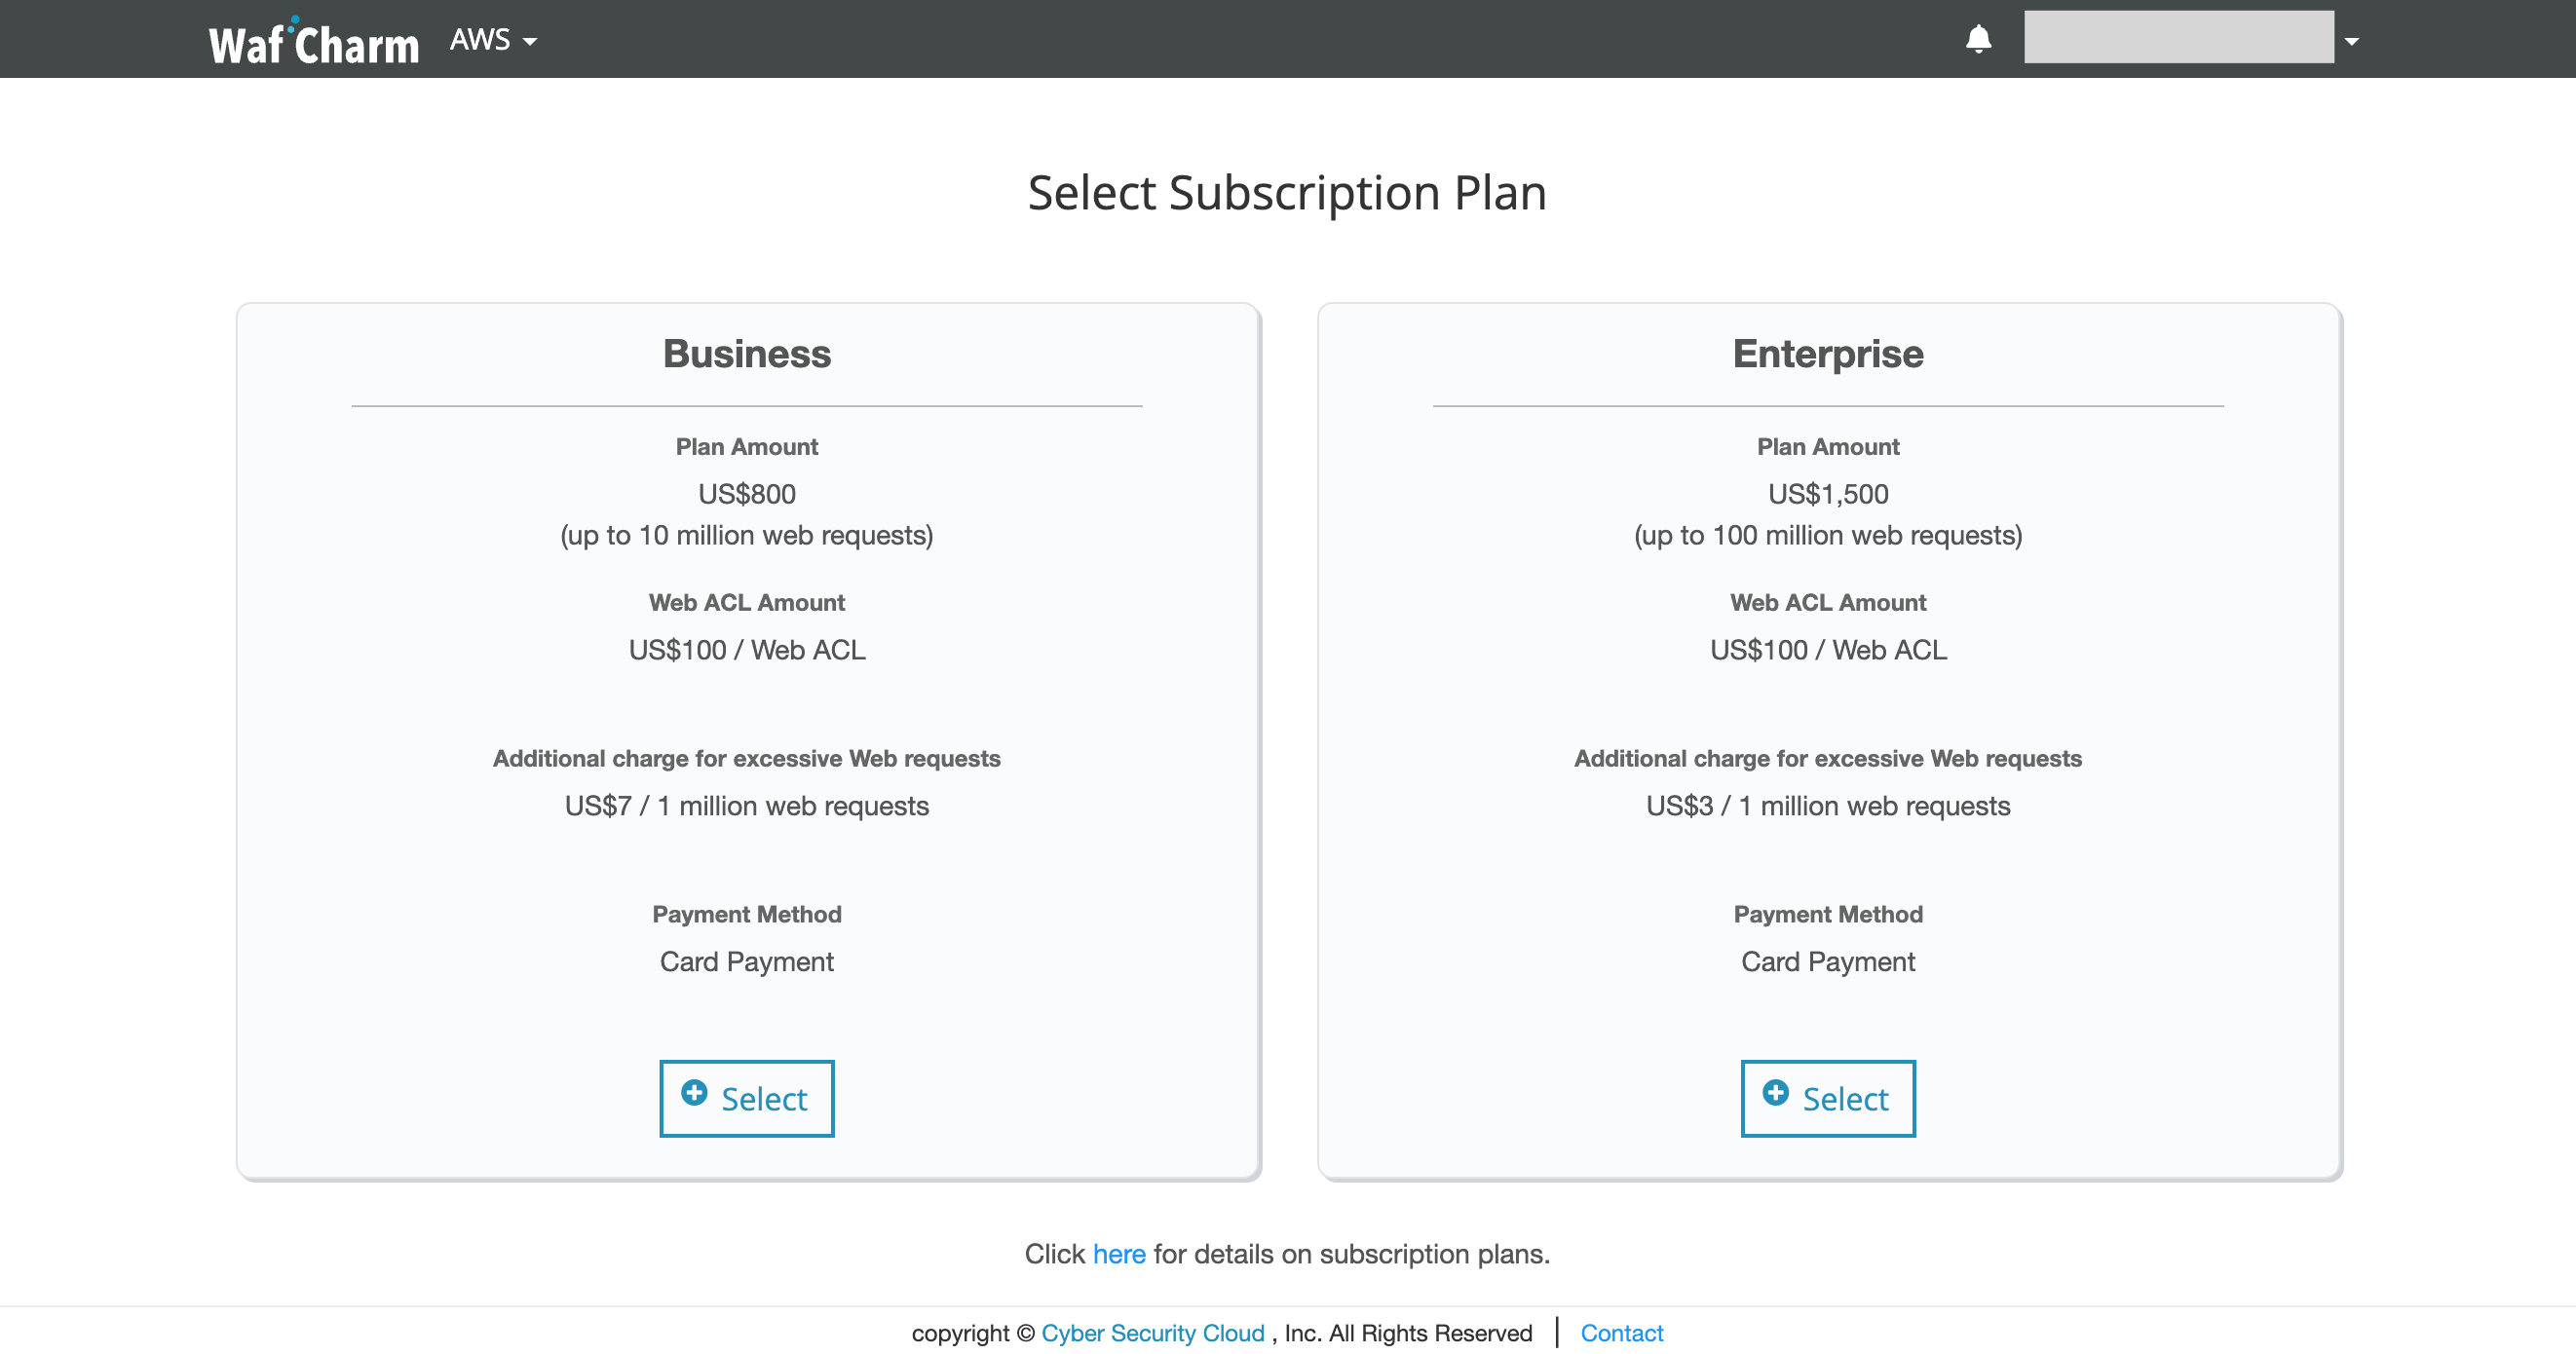
4.4 Enter your billing information.
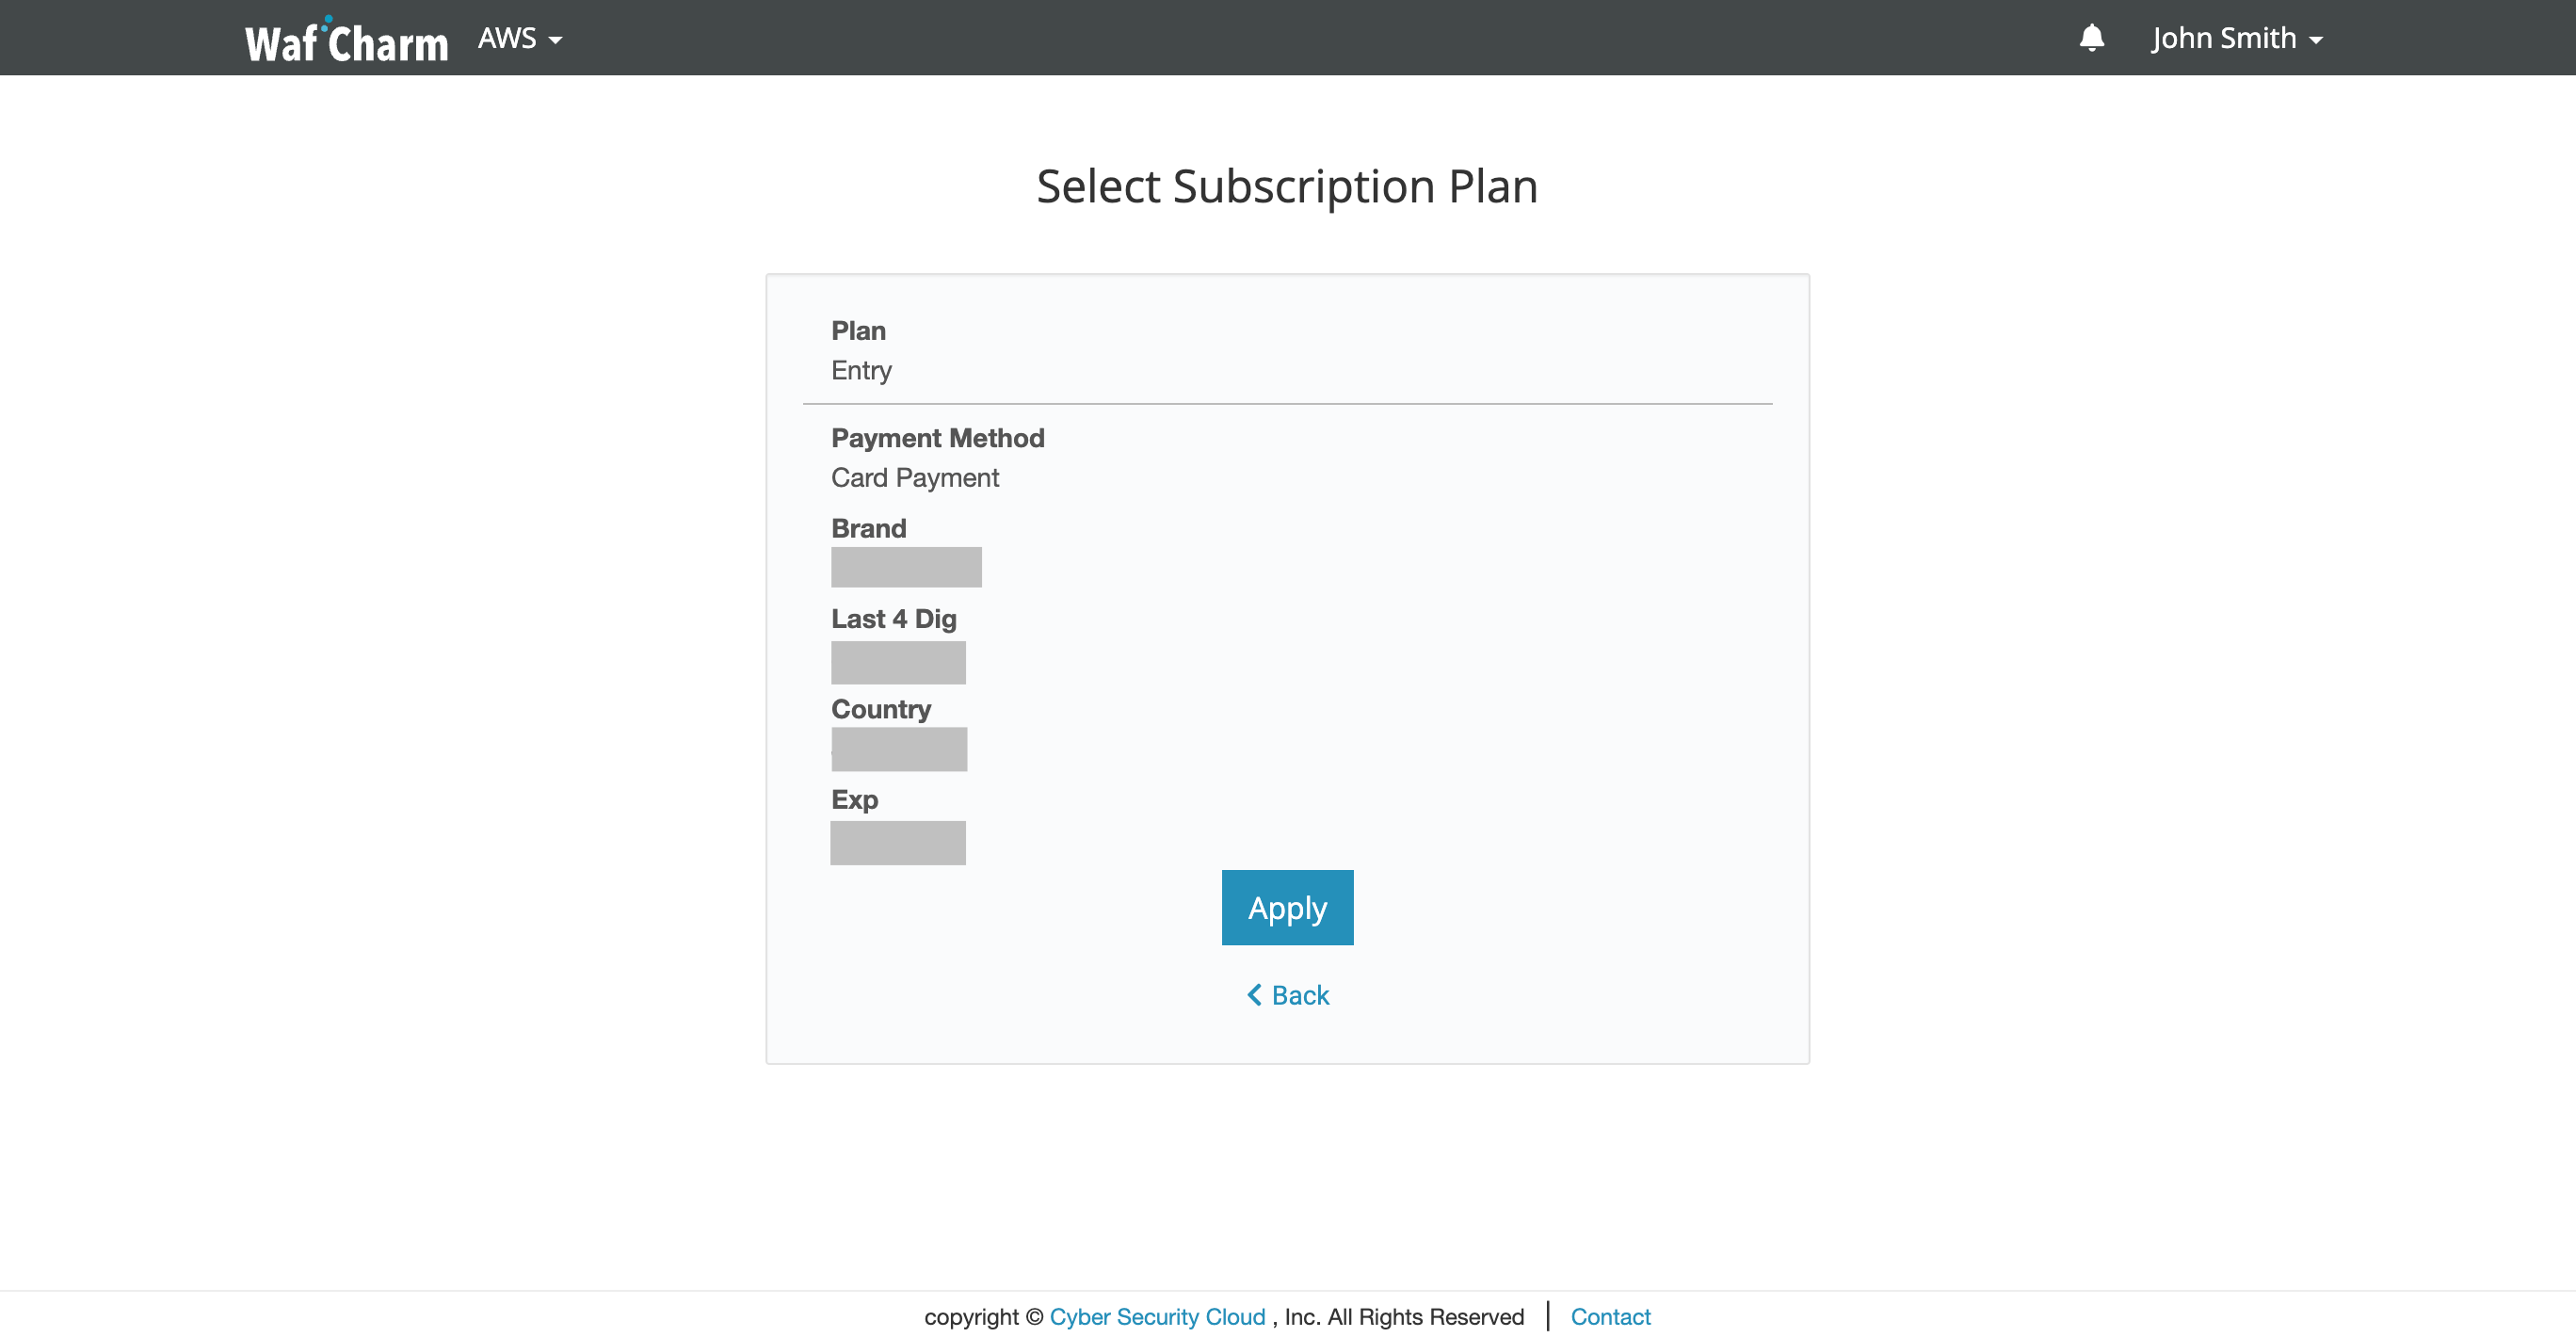
Check the information you’ve entered and click the “Apply” button.
4.6 The step to subscribe to a plan is complete.
5. Add Web ACL and Web Site configurations
5.1 Click “Web ACL Config” after subscribing to a plan.
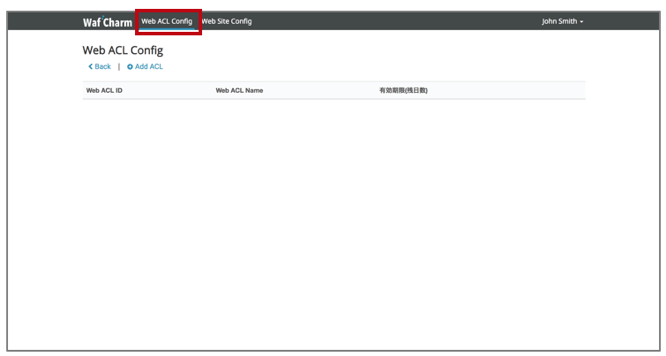
5.2 Enter Web ACL information and click the “Save” button. You can read in more detail about the configuration in the blog post: WafCharm Initial Setting Manual.
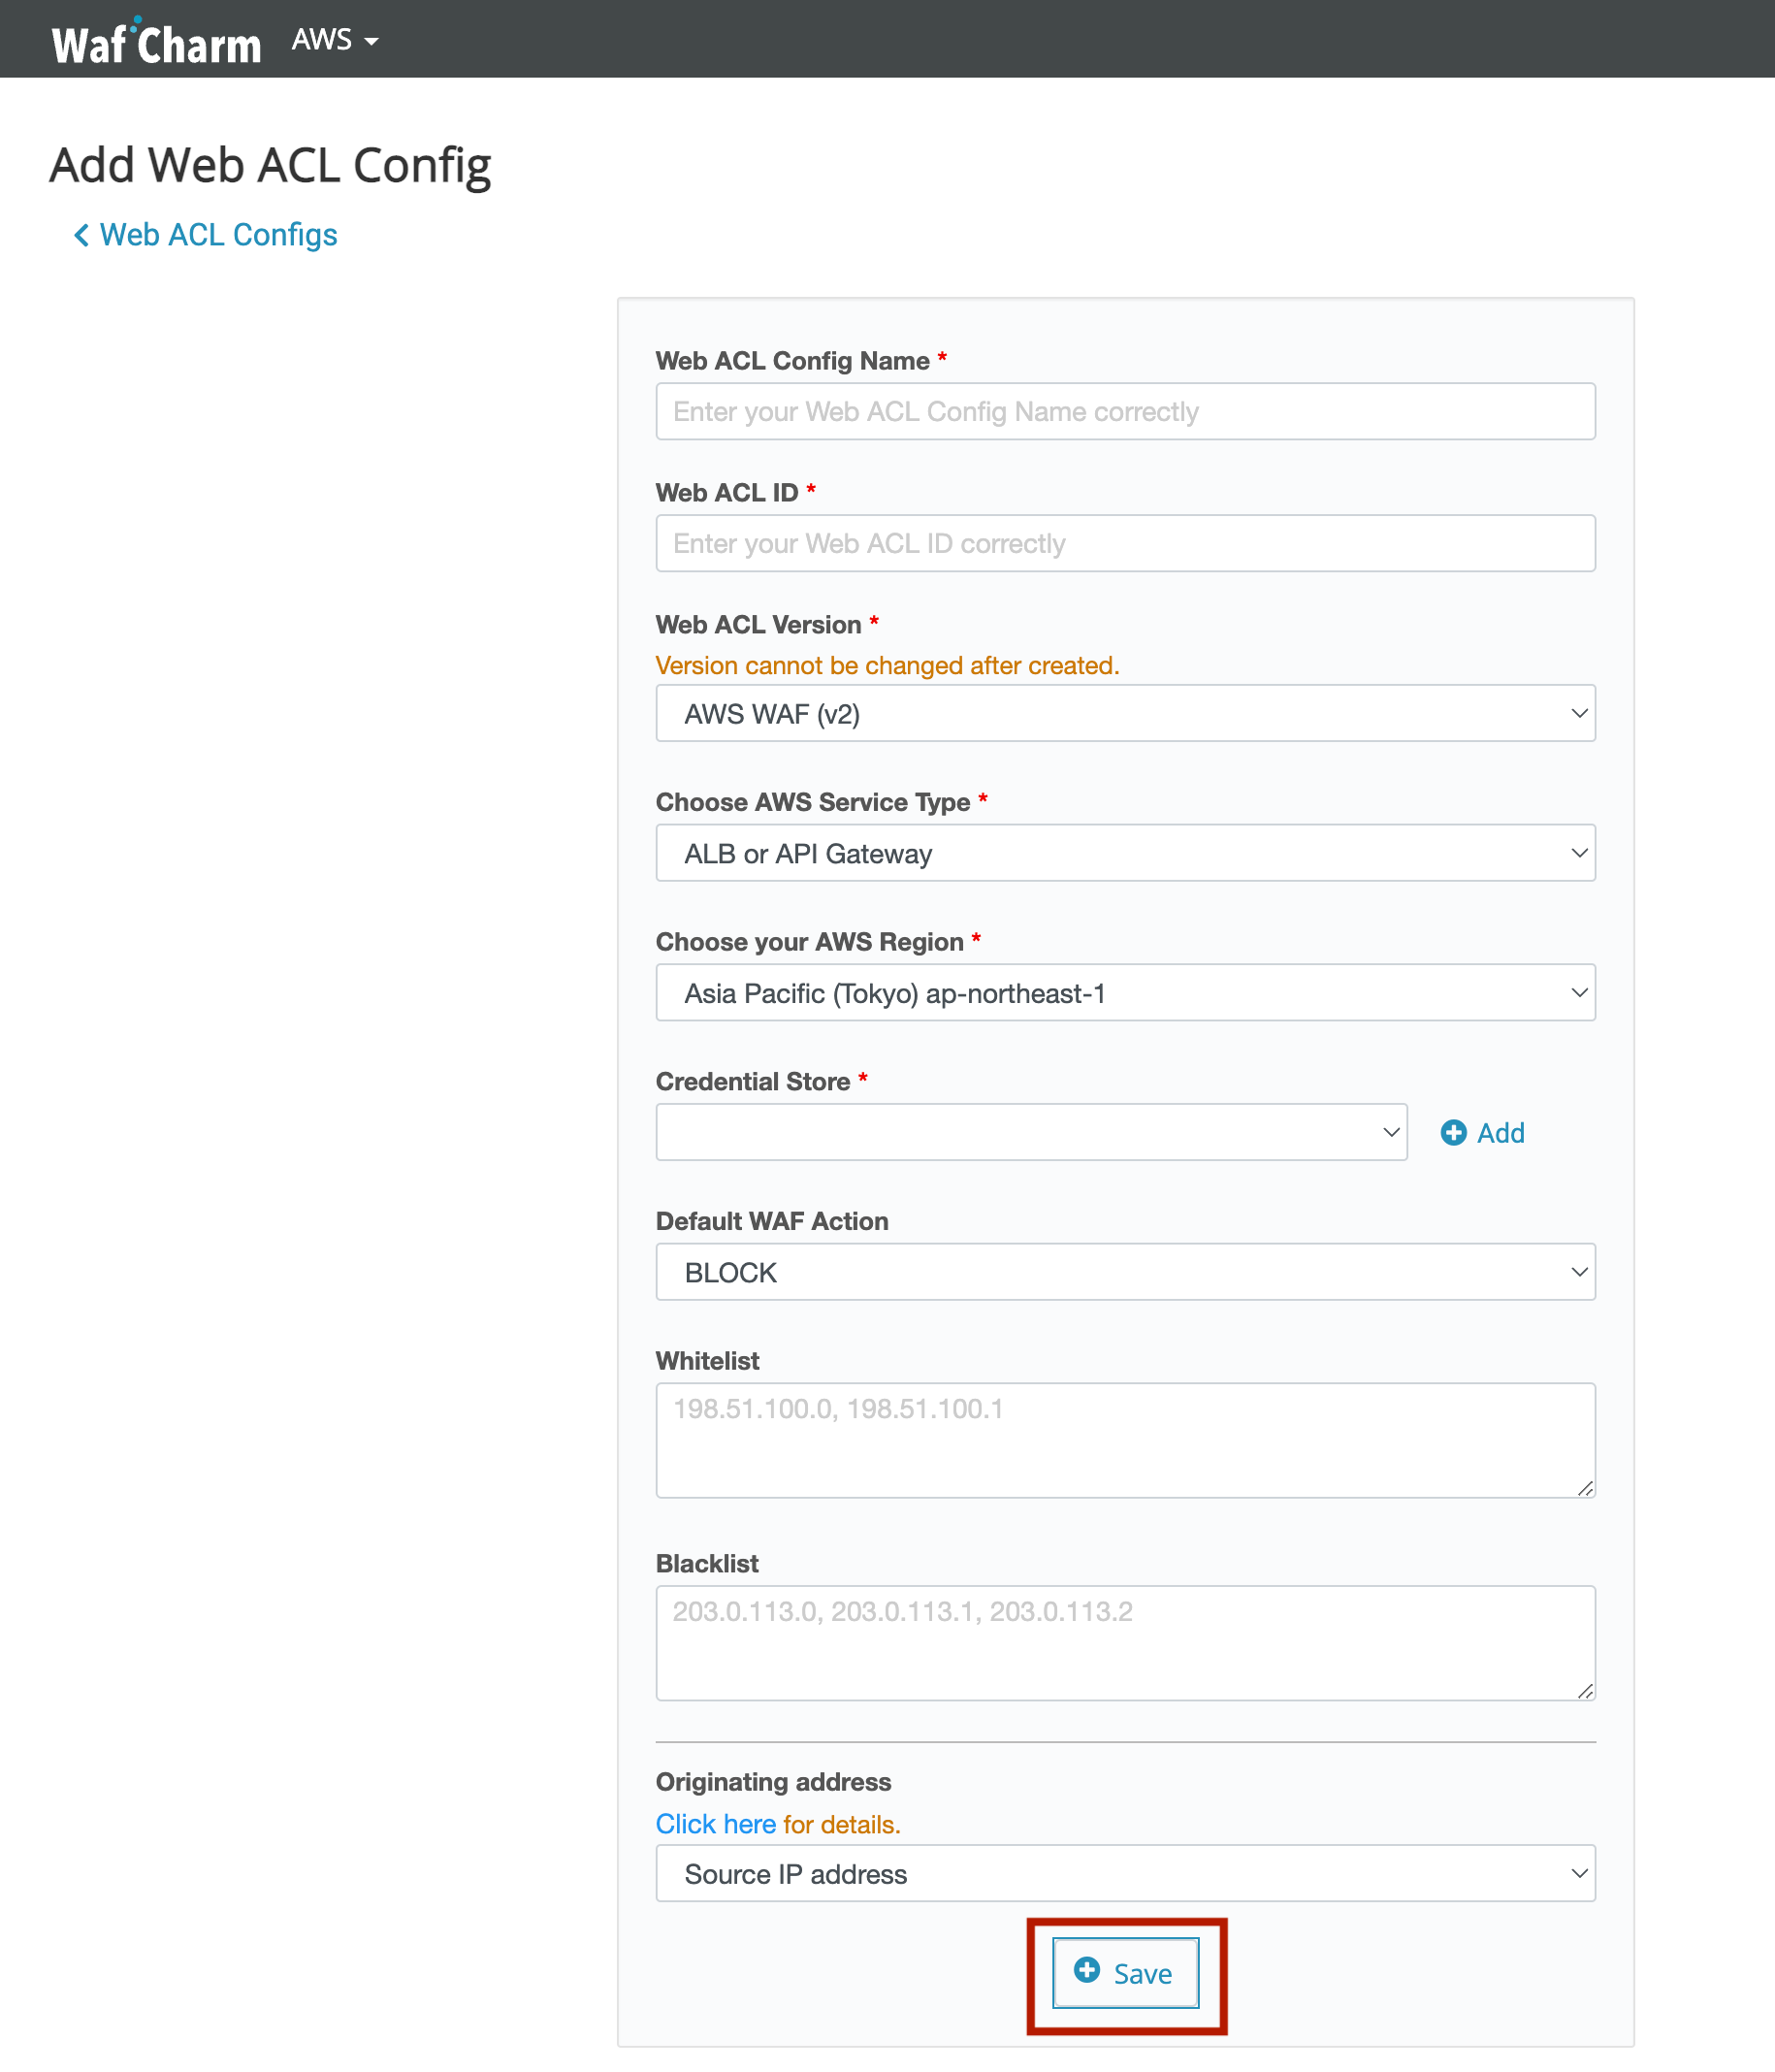
5.3 Next, enter information in Web Site Config and click the “Save” button. You can also read in more detail about the configuration in the blog post: WafCharm Initial Setting Manual.
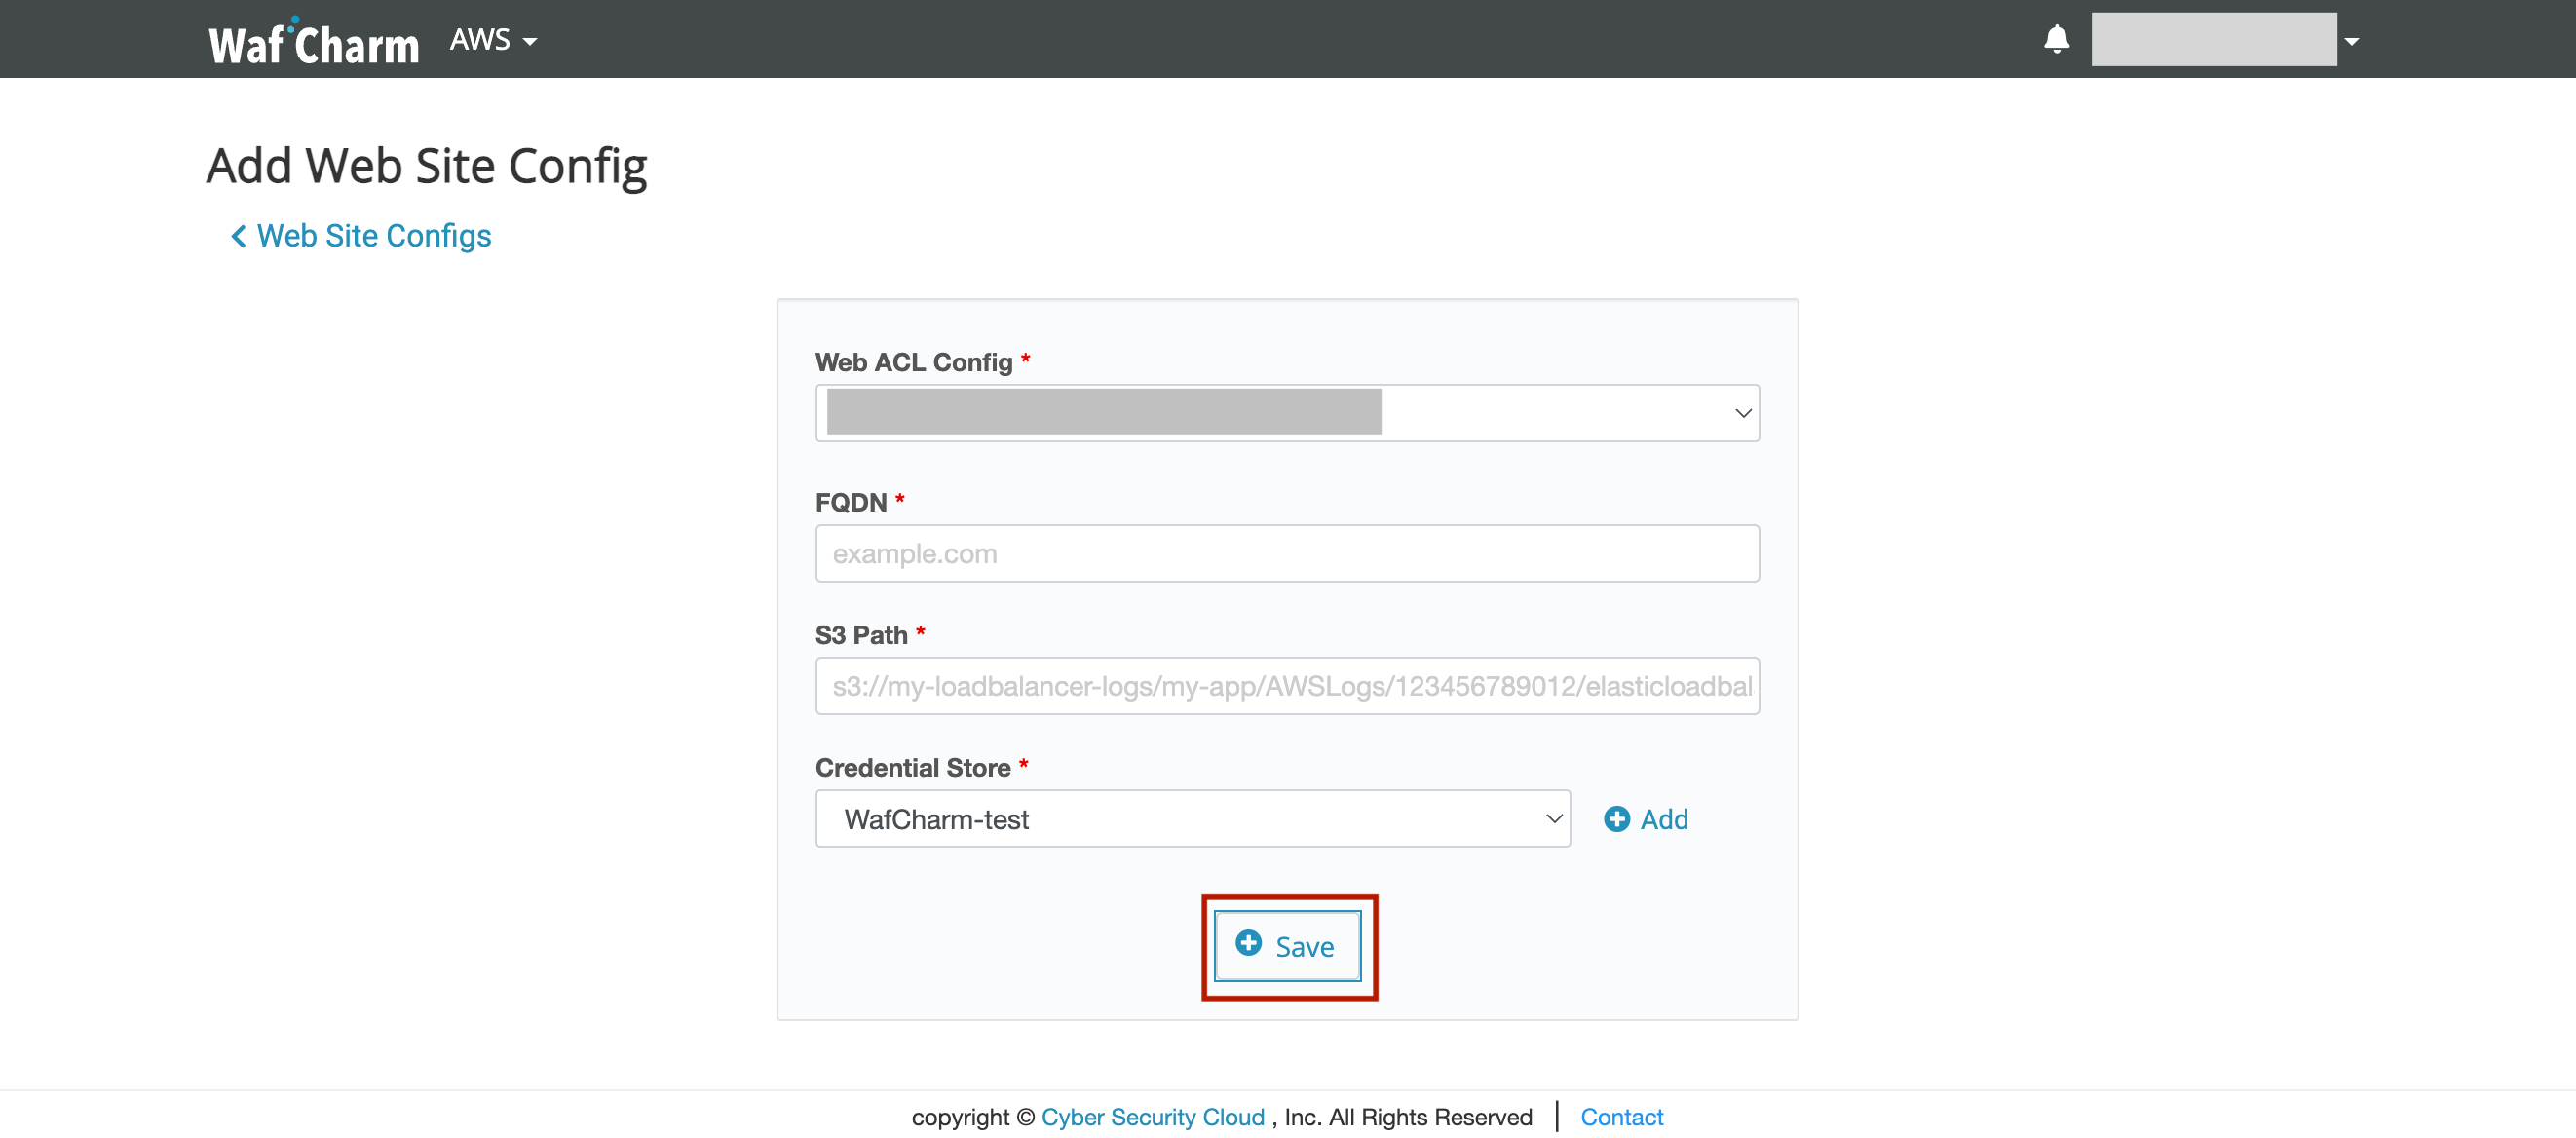
Your Web ACL and Web Site configuration is complete.
6. Start using WafCharm
Once you’ve completed the Web Site configuration, WafCharm rules will be automatically applied. First, let’s check if the WafCharm rules have been applied.
6.1 Check the rules in AWS management console.
AWS management console > AWS WAF > Web ACLs > Select the Web ACL you added in WafCharm dashboard > Rules tab
6.2 If you can see rules that start with “WafCharm”, WafCharm’s automation has started.

6.3 Lastly, we’ll check if the access logs can be obtained properly. Click the “Account” button in the WafCharm dashboard.
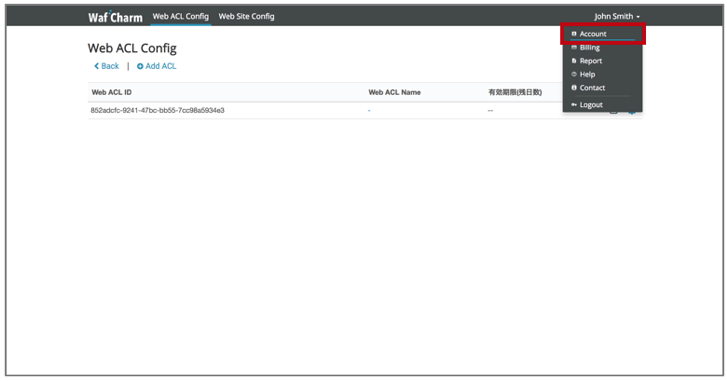
6.4 Check that the numbers displayed beside “This month:” are going up in the Log summary section.
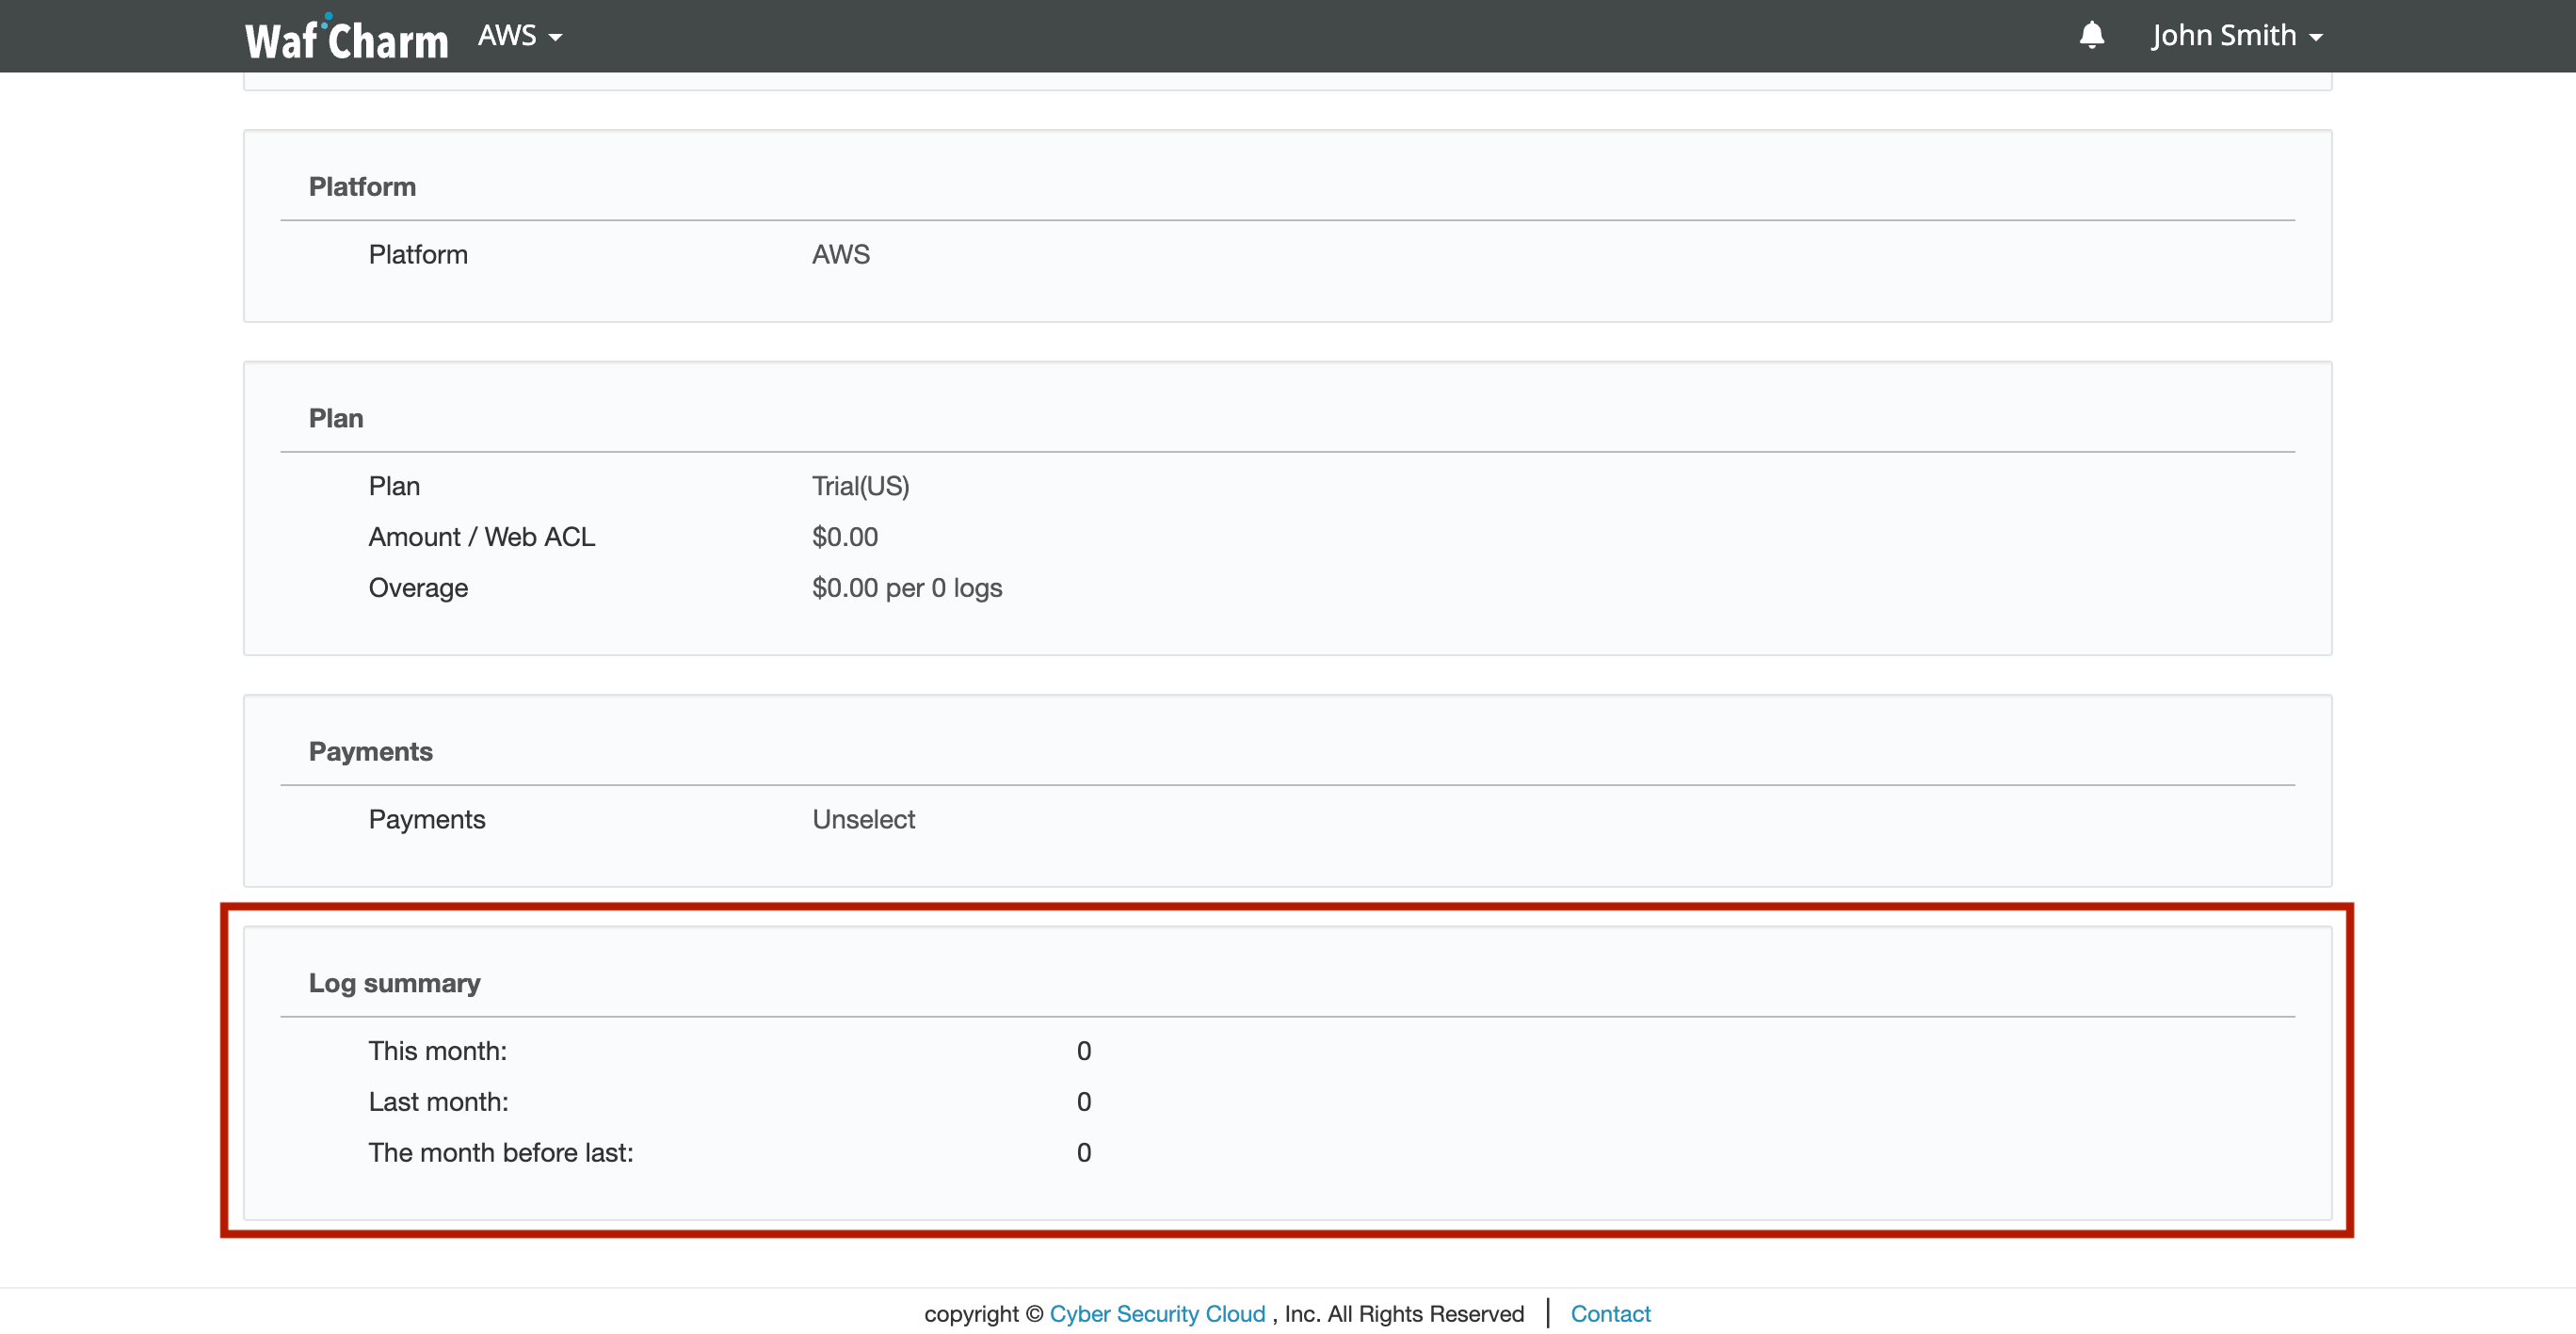
*If the numbers shown in the Log summary seciton are not going up, refer to the blog post: WafCharm Initial Setting Manual.
6.5 The configuration is complete!
WafCharm’s automated management has begun.


