Table of Contents
- 1. Introduction
- 2. Cases Where Rule Application Fails Due to Priority
- 3. How to Change the Rule Priority 1 - For User-Defined Rules
- 4. How to Change the Rule Priority 2 - For Managed Rules
1. Introduction
In WafCharm's Advanced rule policy, each rule is assigned a specific priority. If a rule's priority overlaps with a priority reserved by WafCharm, an "Apply Failed" error may occur during rule application. There are several factors that can cause rule application to fail. In this blog post, we will take a look at the error caused by priority and how to address it.
Please refer to the help page below for more information about the Status field.
Errors shown on each resource for AWS WAF Classic/AWS WAF v2
2. Cases Where Rule Application Fails Due to Priority
As explained on the help page below, the Advanced rule policy has reserved priorities used by WafCharm rules. If these priorities are used by non-WafCharm rules, it may cause a rule application error due to priority overlap.
About WafCharm rules for AWS WAF v2
There are cases where these priorities might unintentionally be used by non-WafCharm rules when you manage web ACLs from the AWS WAF management console. Specifically, this can happen when you use the [Move up] or [Move down] buttons on the [Set rule priority] page. When you use these buttons to change the rule priority, the priorities are swapped between the selected rule and the one immediately before or after it, depending on whether you move the rule up or down.
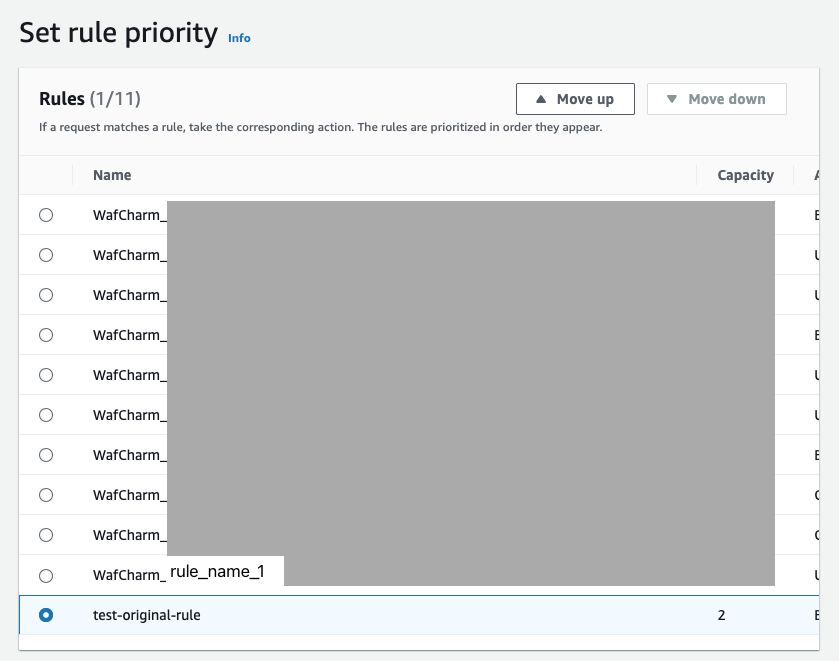
For example, in the screenshot below, the rule [test-original-rule] is positioned at the very end, and a rule whose name starts with [WafCharm_] is placed immediately before it.
*For the sake of this blog post, we will refer to the rule immediately before [test-original-rule] as [WafCharm_rule_name_1].
To move the [test-original-rule] in front, the [Move up] button is clicked. When the [Move up] button is clicked, AWS WAF will change the priority of the [test-original-rule] to the priority number used by [WafCharm_rule_name_1] (421 in this case). The priority of [WafCharm_rule_name_1] will then be changed to 422.
As mentioned on the help page above, 421 is a priority reserved for WafCharm rules. If [test-original-rule] uses this priority, WafCharm will encounter an error when trying to update the web ACLs or make adjustments.
To avoid the error, WafCharm asks that you use priorities from 0 to 99. We will demonstrate how to change the priorities when adding a rule.
3. How to Change the Rule Priority 1 - For User-Defined Rules
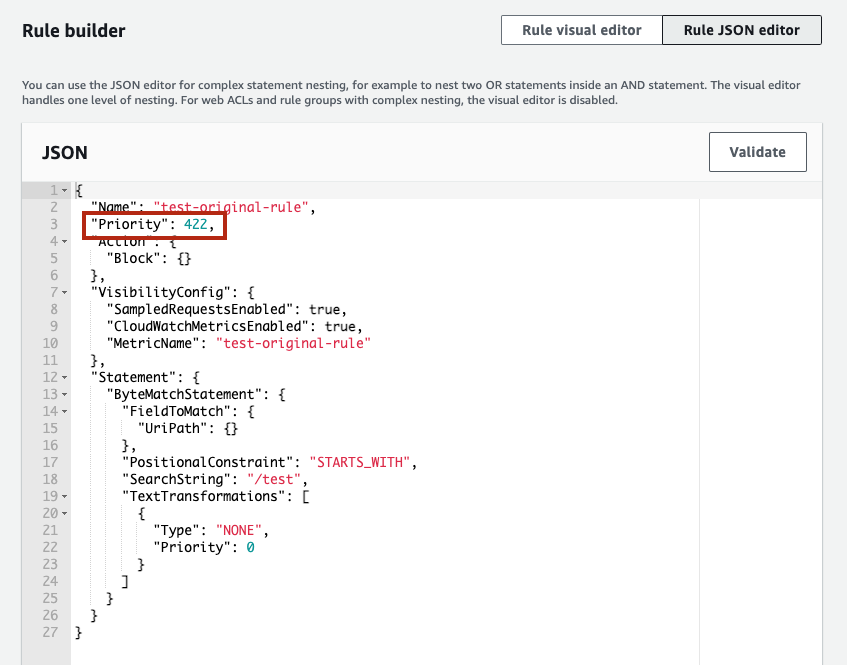
When adding a rule from the AWS WAF console, make sure to explicitly specify the priority using the JSON editor. After configuring the rule, click the [Rule JSON editor] button located in the top right corner of the rule editing page.

By doing so, you can view the rule in JSON format. Look for the line that says "Priority" and change the number next to it to a value between 0 and 99. In the screenshot below, the line reads "Priority": 422,, so replace 422 with a number like 0.
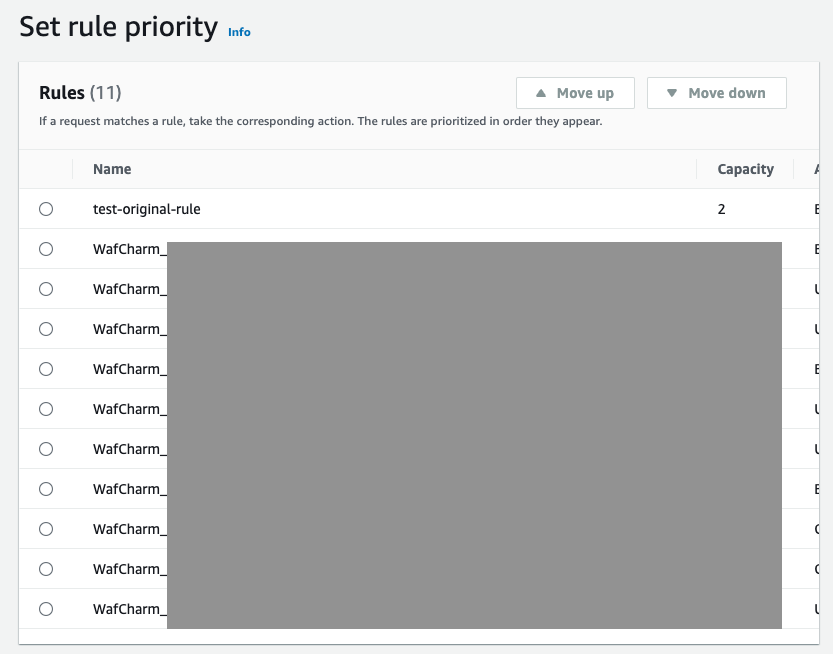
Once the numeric value is changed, click the [Add rule] button. Since the priority has been set to 0, the rule will appear at the very top on the [Set rule priority] page. On this page, click the [Save] button without making any changes.
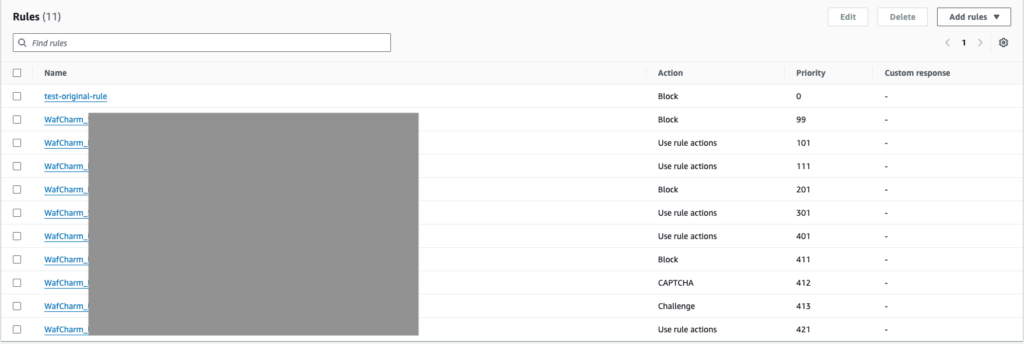
You will see that the priority is set to 0 when you check the applied rules again.
4. How to Change the Rule Priority 2 - For Managed Rules
You can use the JSON editor to adjust the priority for user-defined rules, but the JSON editor cannot be used for Managed Rules. If you are using Managed Rules, you will need to use the AWS CLI to adjust the rule priority. The procedure is explained below.
We will be using AWS CLI commands, but any values that need to be adjusted according to your environment will be enclosed in <> (e.g., web ACL name and CLOUDFRONT or REGIONAL). Please replace the parts marked with <> with values that match your resources.
For more information on how to use the AWS CLI, please refer to the official AWS documentation.
- Run the following command to retrieve the current web ACL information.
aws wafv2 get-web-acl --name <web ACL name> --scope <CLOUDFRONT or REGIONAL> --region=<region> --id <Web ACL ID> - Copy the parts contained within
"Rules": []from the obtained web ACL information. - Paste the copied information into an editor and enclose the entire content in
[].
Example:[ { "Name": "WafCharm_AAA_XXX", "Priority": 101, "Statement": { "RuleGroupReferenceStatement": { "ARN": "Rule group ARN" } }, "OverrideAction": { "None": {} }, "VisibilityConfig": { "SampledRequestsEnabled": true, "CloudWatchMetricsEnabled": true, "MetricName": "WafCharm_AAA_XXX" } }, { "Name": "WafCharm_BBB_XXX", "Priority": 111, "Statement": { "RuleGroupReferenceStatement": { "ARN": "Rule group ARN" } }, "OverrideAction": { "None": {} }, "VisibilityConfig": { "SampledRequestsEnabled": true, "CloudWatchMetricsEnabled": true, "MetricName": "WafCharm_BBB_XXX" } }, { "Name": "WafCharm_CCC_XXX", "Priority": 301, "Statement": { "RuleGroupReferenceStatement": { "ARN": "Rule group ARN" } }, "OverrideAction": { "None": {} }, "VisibilityConfig": { "SampledRequestsEnabled": true, "CloudWatchMetricsEnabled": true, "MetricName": "WafCharm_CCC_XXX" } }, { "Name": "WafCharm_DDD_XXX", "Priority": 421, "Statement": { "RuleGroupReferenceStatement": { "ARN": "Rule group ARN" } }, "OverrideAction": { "None": {} }, "VisibilityConfig": { "SampledRequestsEnabled": true, "CloudWatchMetricsEnabled": true, "MetricName": "WafCharm_UseCase_Regex_XXX" } } ] - Add the desired rules in JSON format and save the file. If you are unsure how to specify the Managed Rules in JSON format, you can first add them to your web ACL using the AWS WAF console without changing the order and then retrieve the information using the
get-web-aclcommand.
Example: If you want to apply [AWS-AWSManagedRulesAdminProtectionRuleSet] from AWS Managed Rules with priority 10 (before the WafCharm rules), use the following JSON rule.[ { "Name": "AWS-AWSManagedRulesAdminProtectionRuleSet", "Priority": 10, "Statement": { "ManagedRuleGroupStatement": { "VendorName": "AWS", "Name": "AWSManagedRulesAdminProtectionRuleSet" } }, "OverrideAction": { "None": {} }, "VisibilityConfig": { "SampledRequestsEnabled": true, "CloudWatchMetricsEnabled": true, "MetricName": "AWS-AWSManagedRulesAdminProtectionRuleSet" } }, { "Name": "WafCharm_AAA_XXX", "Priority": 101, "Statement": { "RuleGroupReferenceStatement": { "ARN": "Rule group ARN" } }, "OverrideAction": { "None": {} }, "VisibilityConfig": { "SampledRequestsEnabled": true, "CloudWatchMetricsEnabled": true, "MetricName": "WafCharm_AAA_XXX" } }, { "Name": "WafCharm_BBB_XXX", "Priority": 111, "Statement": { "RuleGroupReferenceStatement": { "ARN": "Rule group ARN" } }, "OverrideAction": { "None": {} }, "VisibilityConfig": { "SampledRequestsEnabled": true, "CloudWatchMetricsEnabled": true, "MetricName": "WafCharm_BBB_XXX" } }, { "Name": "WafCharm_CCC_XXX", "Priority": 301, "Statement": { "RuleGroupReferenceStatement": { "ARN": "Rule group ARN" } }, "OverrideAction": { "None": {} }, "VisibilityConfig": { "SampledRequestsEnabled": true, "CloudWatchMetricsEnabled": true, "MetricName": "WafCharm_CCC_XXX" } }, { "Name": "WafCharm_DDD_XXX", "Priority": 421, "Statement": { "RuleGroupReferenceStatement": { "ARN": "Rule group ARN" } }, "OverrideAction": { "None": {} }, "VisibilityConfig": { "SampledRequestsEnabled": true, "CloudWatchMetricsEnabled": true, "MetricName": "WafCharm_DDD_XXX" } } ] - Run the following command to update the web ACL. Use the lock token obtained from the previous
get-web-aclcommand.
aws wafv2 update-web-acl --name <web ACL name> --scope <CLOUDFRONT or REGIONAL> --region=<region> --id <Web ACL ID> --lock-token <Lock token value> --default-action <Block={}|Allow={}> --rules <file://example.json> --visibility-config SampledRequestsEnabled=<true|false>,CloudWatchMetricsEnabled=<true|false>,MetricName=<web ACL metrics name>
The update is successful if the lock token is returned as shown below.{ "NextLockToken": "Lock token value" } - Verify that the web ACL is in the expected state.