AWS WAFでは特定のIPアドレスからのアクセスをブロックする機能があります。特定のIPアドレスをブロックするには、ブラックリストを新規に作成するか、Web ACLに適用しているブラックリストへIPアドレスを追加する、合計2つの方法があります。
この記事では2つの方法の具体的なやり方をわかりやすく紹介します。
目次
ブラックリストの新規作成方法
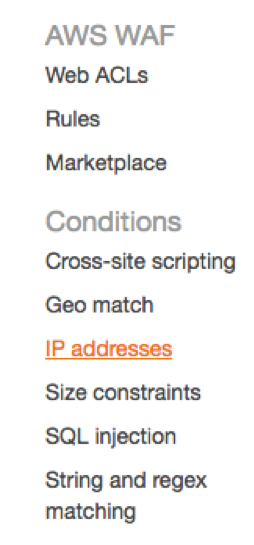
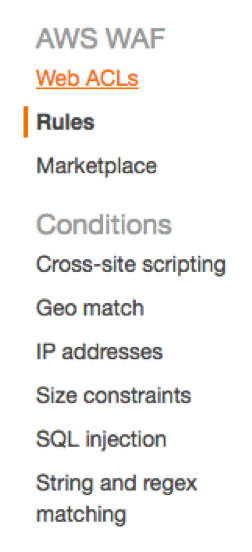
1.WAFのサービスページで[IP addresses]を選択します。
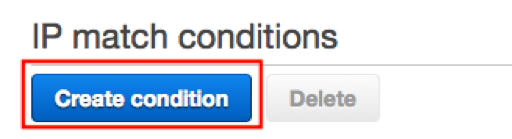
2.[Create condition] をクリックします。
3.以下の手順を実施します。
- Name* は 任意の名前を入力します。
(ホワイトリストの条件と識別できる名前を推奨します。) - IP Version* は IPv4 を選択します。
- ブラックリストに追加したいIPアドレス(CIDR表記)をAddress* に追加します。
(単一のIPアドレスを指定する場合は ”/32” をIPの後に入力してください。) - Add IP address or range をクリックします。

4.IP address of the request to filter on に先ほど追加したIPアドレスが記載されてい ることを確認し、Create をクリックします。

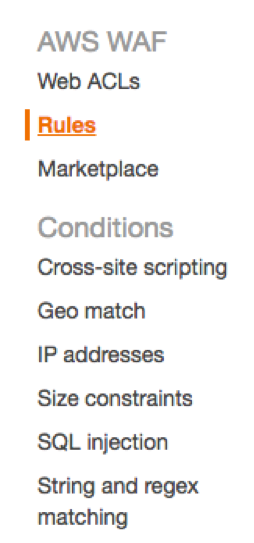
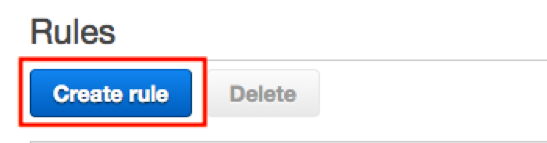
5.続いて、サイドメニューの [Rules] をクリックします。
6.[Create rule] をクリックします。
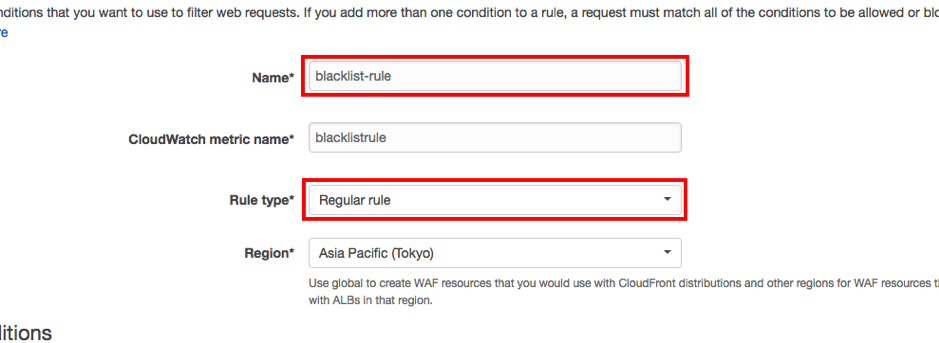
7.以下の手順を実施します。
- Name* は 任意の名前を入力します。
(ホワイトリストのルールと識別できる名前を推奨します。) - Rule type* は Regular rule を選択します。
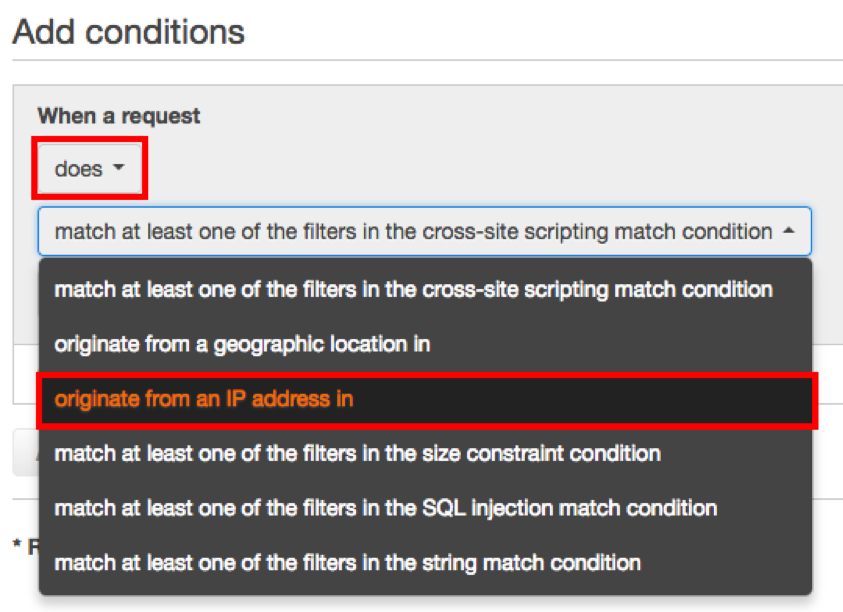
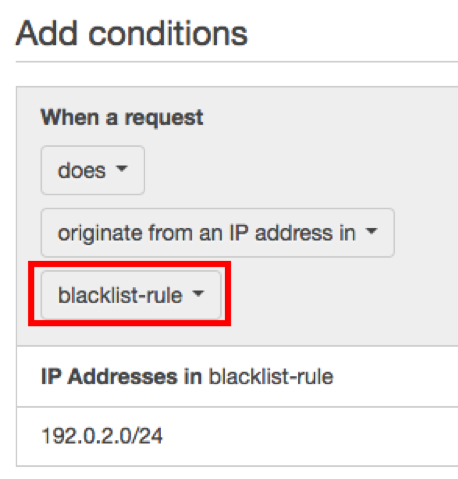
8.When a request を does / originate from an IP address in を選択します。
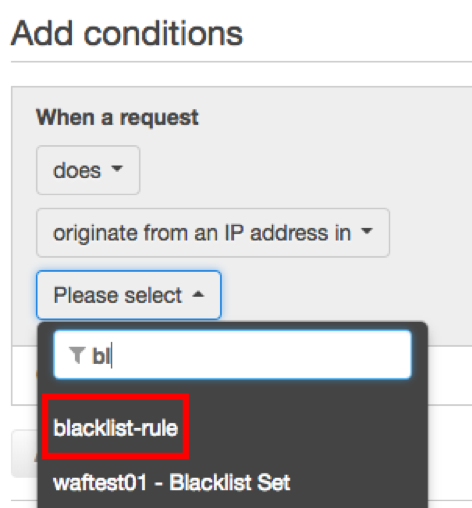
9.先ほど作成した条件を選択します。
10.条件の内容が反映されていることを確認します。
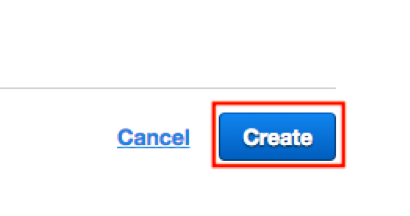
11.問題がなければ [Create] をクリックします。
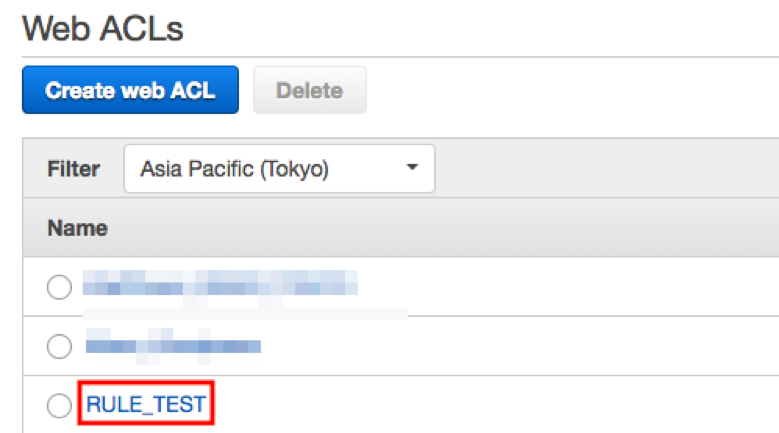
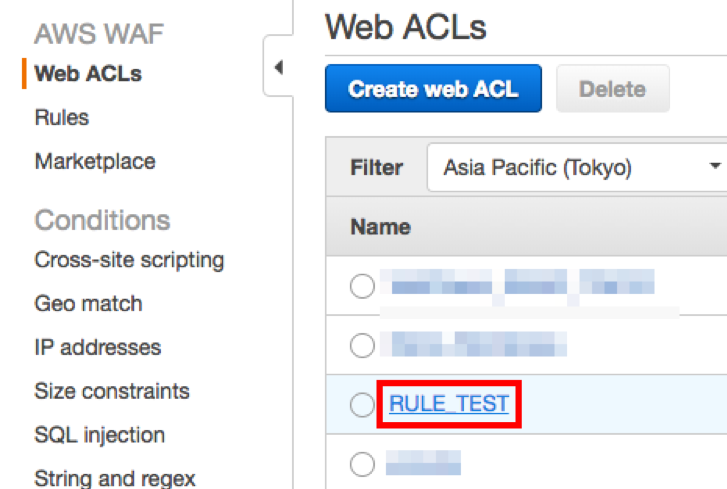
12.[Web ACLs] をクリックします。
13.対象のWeb ACL をクリックします。
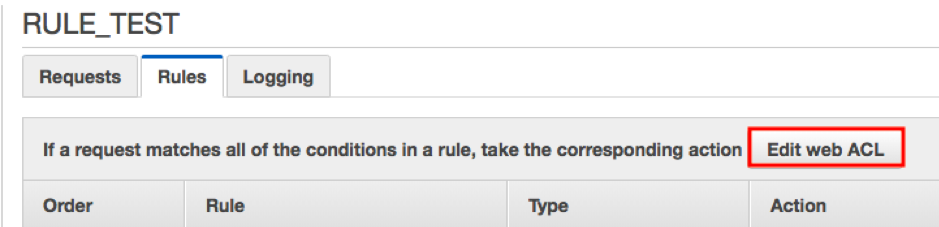
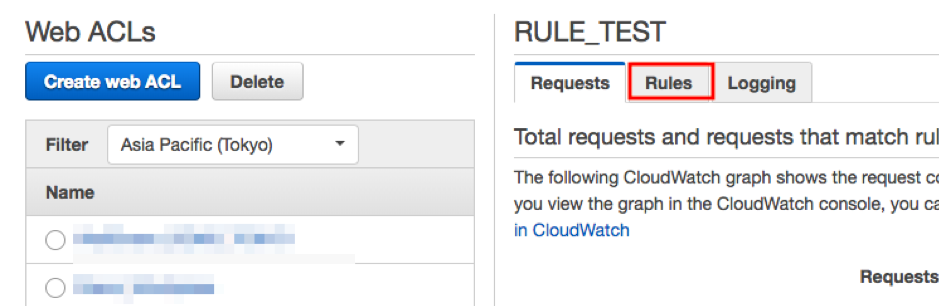
14.[Rules] のタブをクリックします。

15.[Edit web ACL] をクリックします。
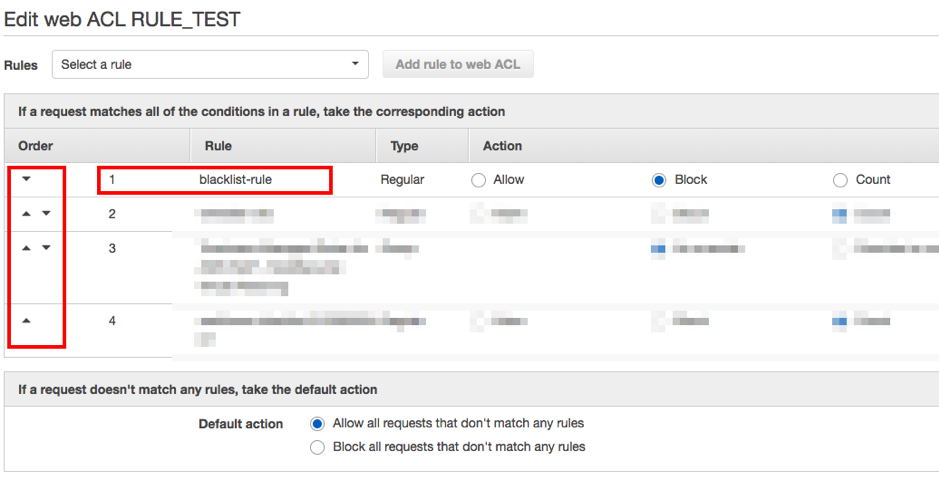
16.先ほど作成したルールを追加します。

17.追加したルールのアクションはブロックします。
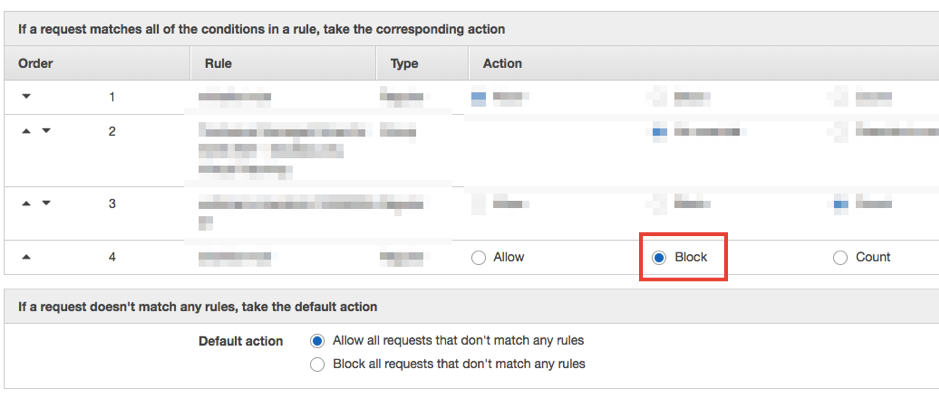
18.プライオリティを任意の位置に設定します。
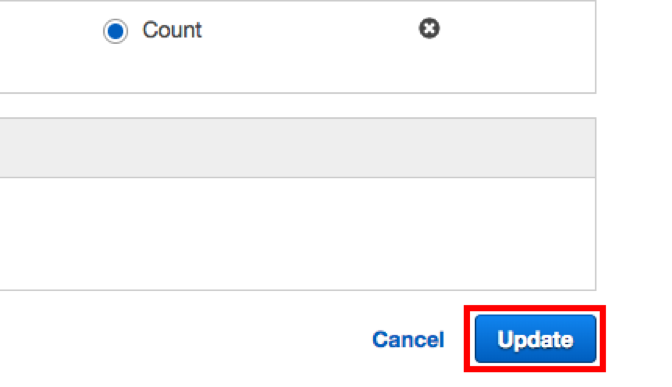
19.問題なければ [Update] をクリックします。
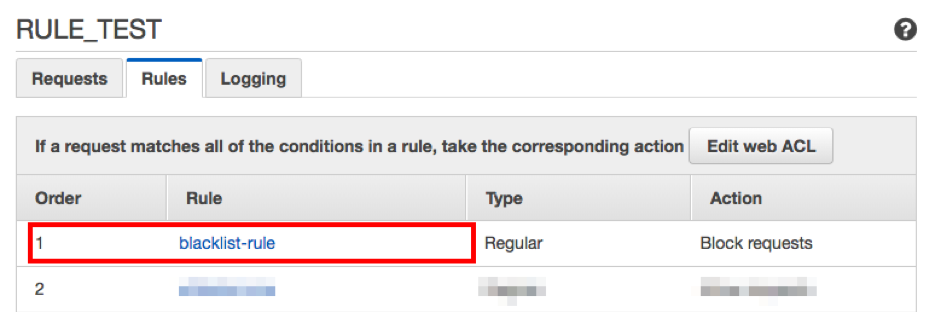
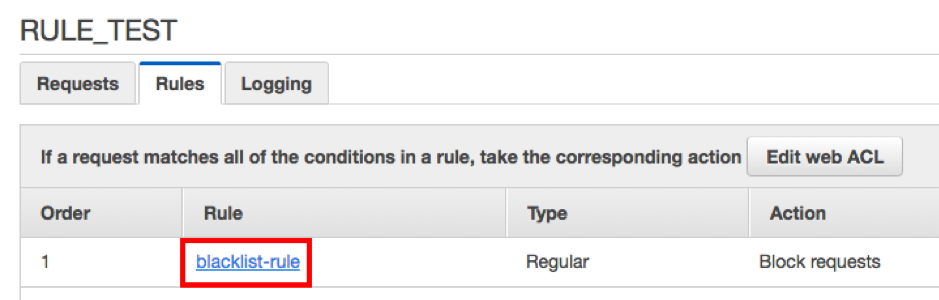
20.作成したルールが適用されており、順番が指定通りの位置に表示されていれば完了です。
Web ACLに適用しているブラックリストへのIPアドレスの追加
1.対象のWeb ACLをクリックします。
2.[Rules] のタブをクリックします。
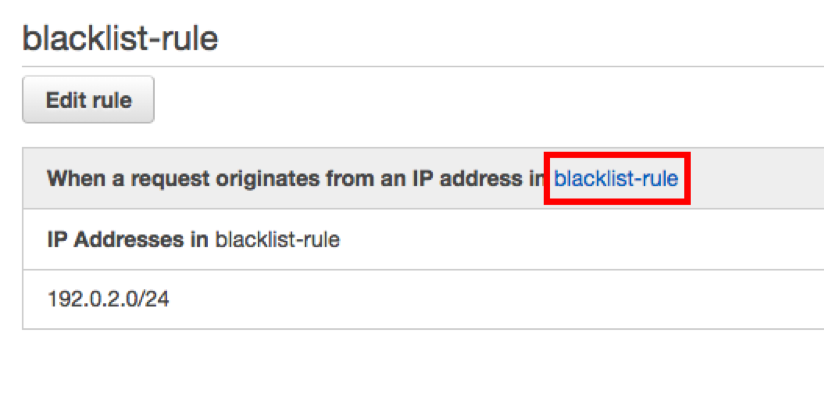
3.対象のルール名をクリックします。
4.新しいタブに開かれたページで条件名をクリックします。
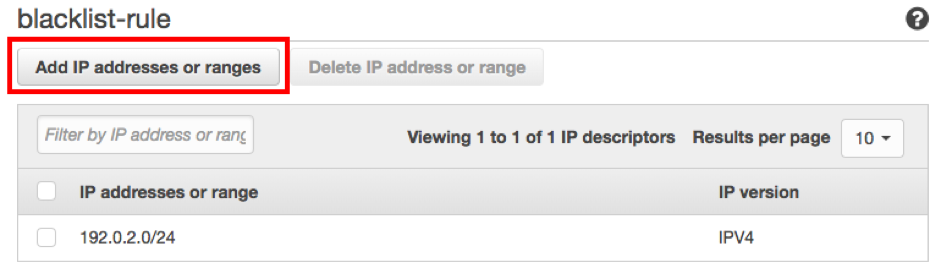
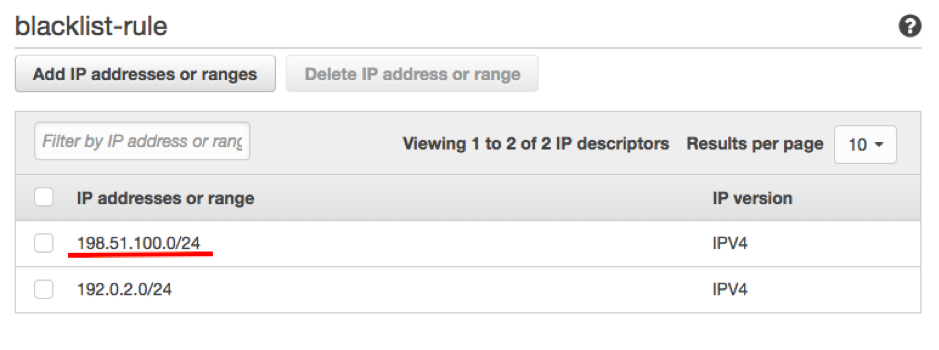
5.[Add IP addresses or ranges]をクリックします。
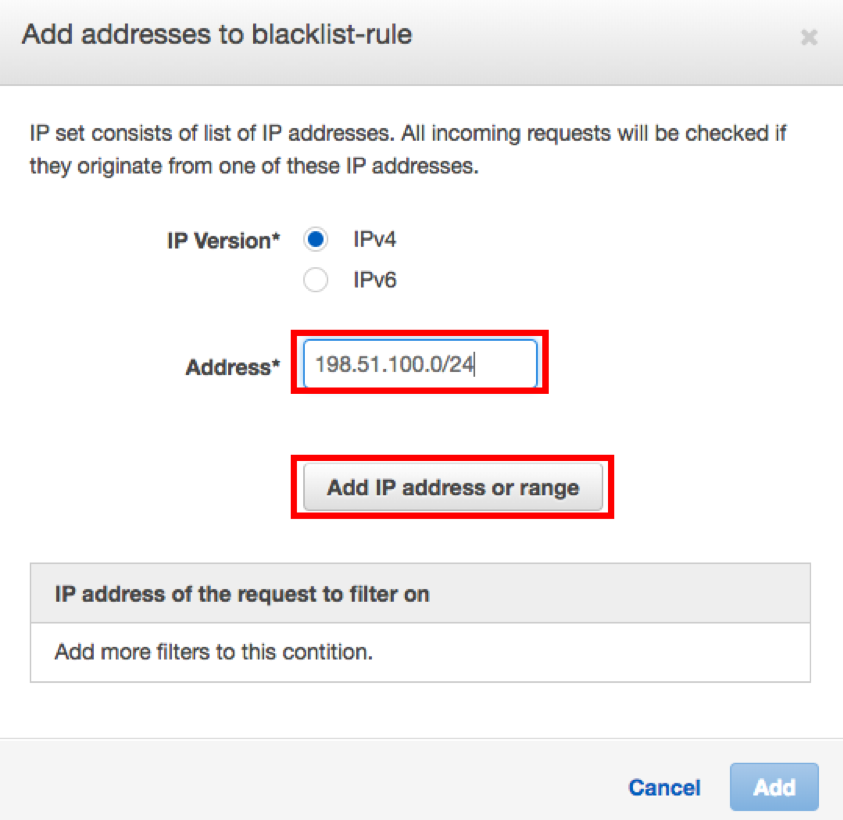
6.追加したいIPアドレス(CIDR表記)を入力し、[ADD IP address or range]をクリックします。
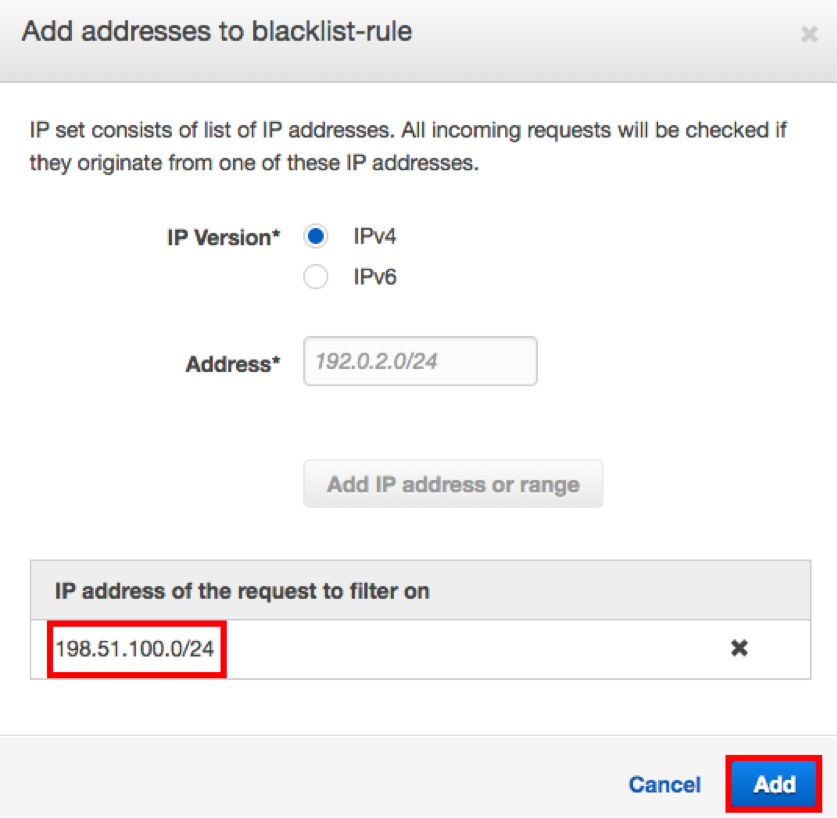
7.IP address of the request to filter on を確認し、問題なければ、[Add]をクリックします。
8.追加されていることが確認できれば追加登録完了です。
まとめ
今回はAWS WAFを導入後、特定のIPアドレスから攻撃と思われるリクエストがあった時にブラックリストによる対応方法を紹介しました。 IPアドレスを特定できればこのような方法で攻撃に対する一時的な対応ができます。